How to Draw Phineas
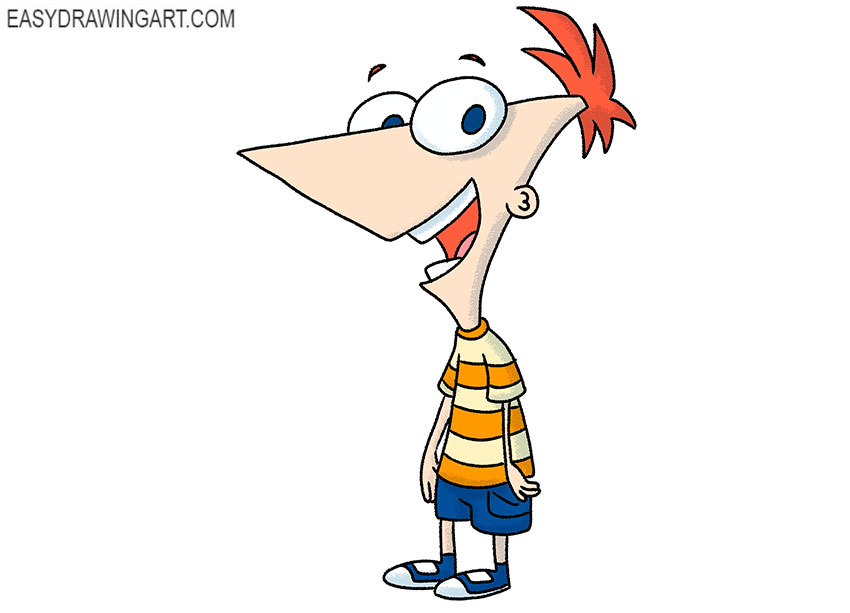
We are pleased to offer you detailed instructions on how to draw Phineas step by step. This is the main character of the cartoon “Phineas and Ferb”.
Phineas is a smart, sympathetic and optimistic boy. He has warm relationships with family and friends.
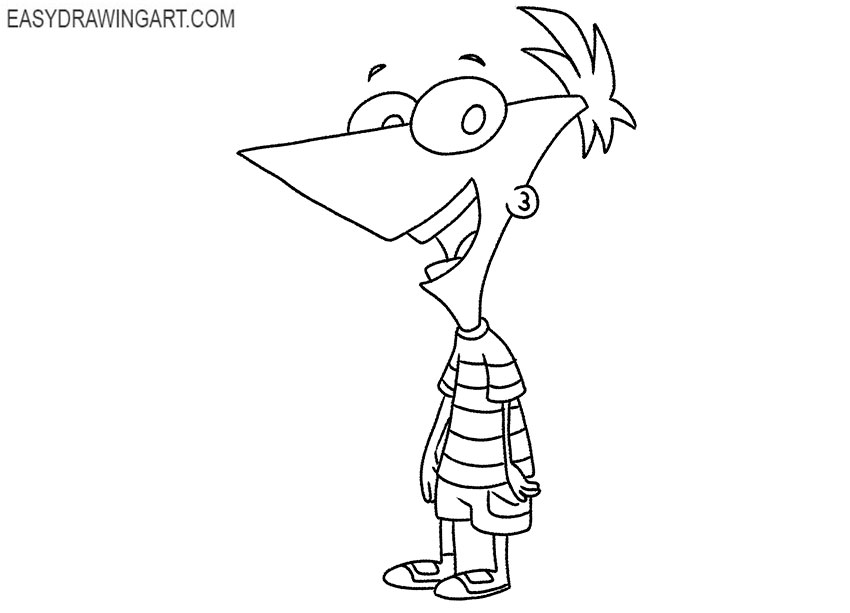
Phineas has short red hair, a triangular head with a pointed nose, and large dark blue eyes. Phineas is wearing a striped T-shirt and blue shorts.
There are sneakers on the feet. All these elements you have to depict in your drawing.
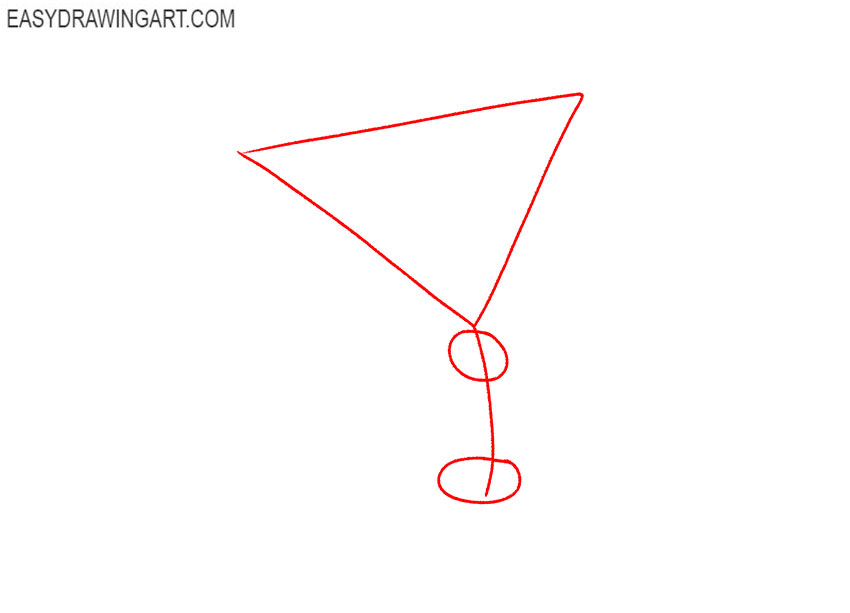
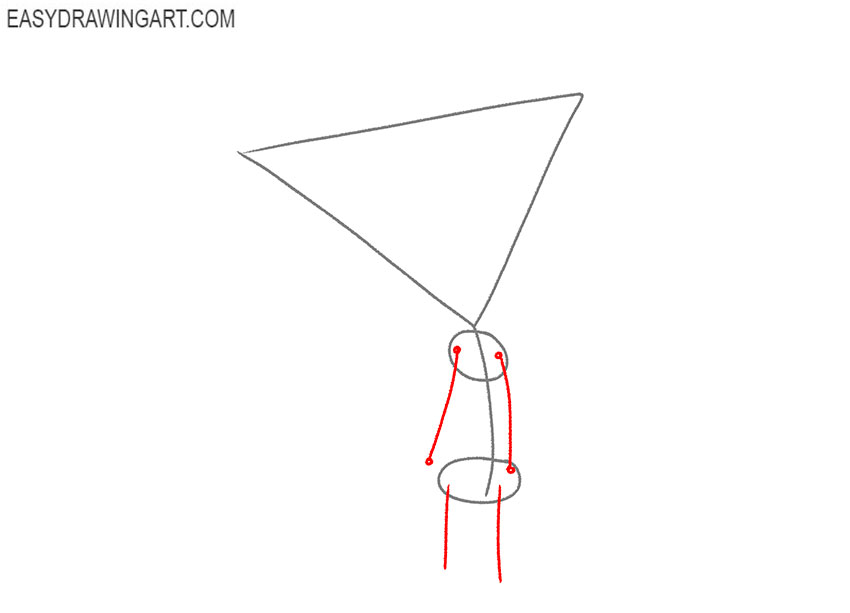
Step 1: Sketch Phineas’s body construction
Draw a triangular guide for Phineas’s head, then add small oval shapes for the chest and pelvis. Connect the body guides with a smooth centerline that follows the curve of the pose.
Step 2: Add Phineas’s arm and leg guides
Extend thin lines from the chest and pelvis to mark both arms and legs. Add circles at the shoulders and larger shapes for the hands, then add the guides to illustrate each limb’s position.
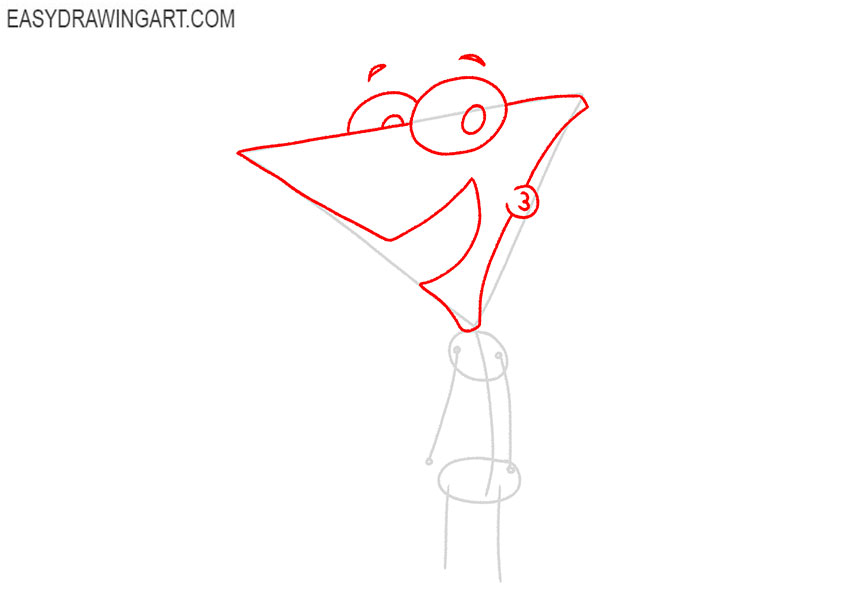
Step 3: Outline Phineas’s head and face
Refine the triangular head around the guide, forming the long pointed nose and lower jaw. Add the large eyes and open mouth, then draw the ear with a simple curved outline.
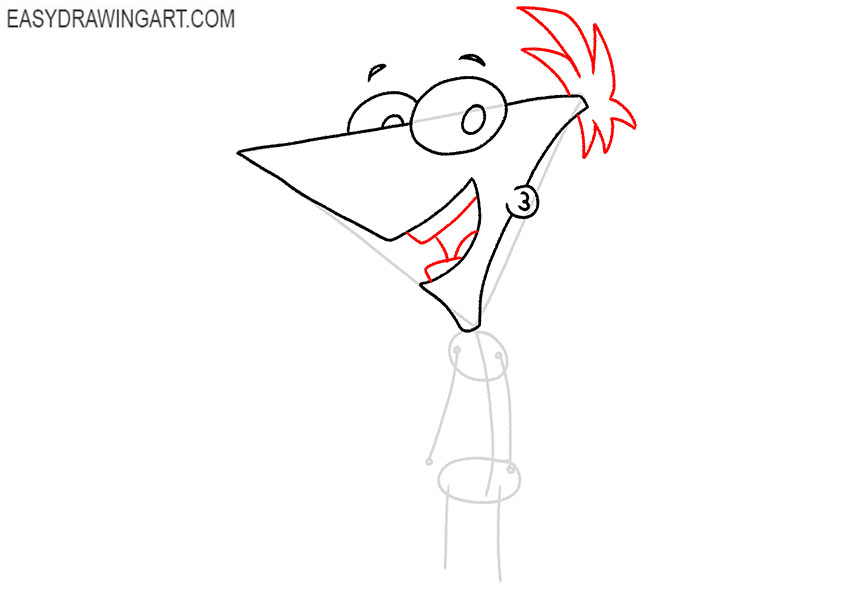
Step 4: Draw Phineas’s hair and mouth details
Add two rows of pointed locks along the crown while drawing the hair. Inside the open mouth, outline the upper and lower teeth, then place the tongue near the bottom.
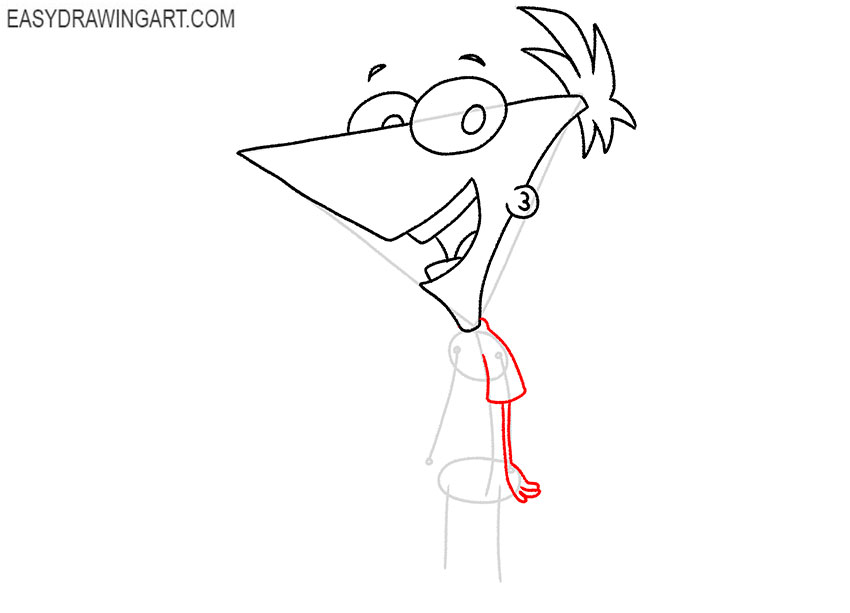
Step 5: Draw Phineas’s first arm and hand
Outline the short sleeve around the shoulder guide, then trace both sides of the arm toward the wrist. Finish by drawing the hand with separate fingers at the end.
Step 6: Outline the shirt and second arm
Draw the sides of the torso around the chest guide and connect them with the lower edge of the T-shirt of Phineas. Add the visible sleeve and arm on the far side, letting part of the limb remain hidden.
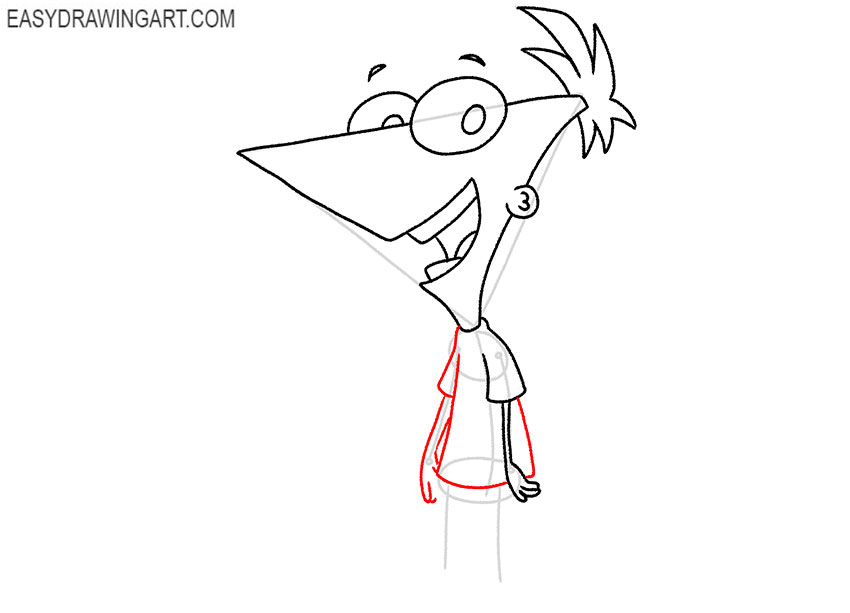
Step 7: Draw Phineas’s shorts
Below the shirt, continue by drawing the shorts around the pelvis guide. Add the waistband, side contours, and two short pant legs with curved lower edges.
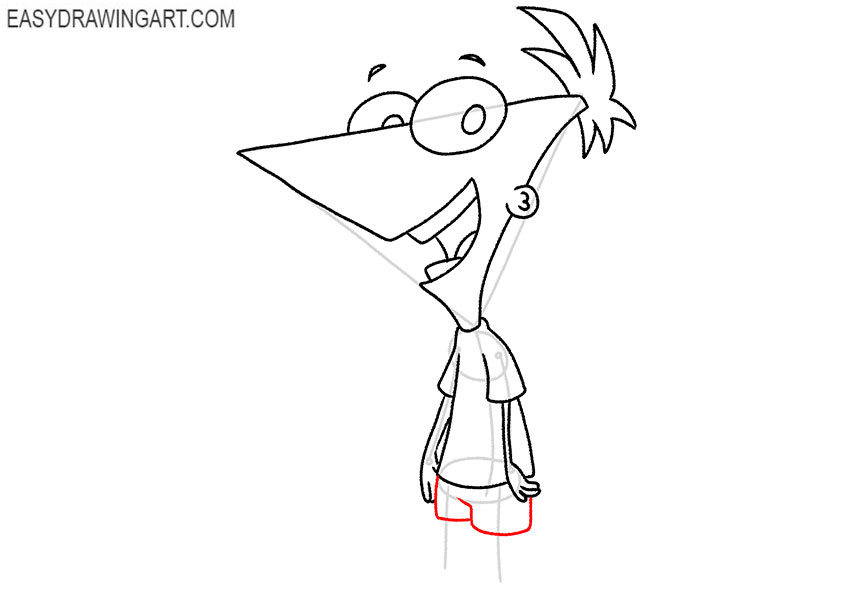
Step 8: Outline the legs and sneakers
Trace both sides of the thin leg guides down from the shorts. At the ends, draw the sneakers with broad oval-like outlines, flat soles, and short upper edges.
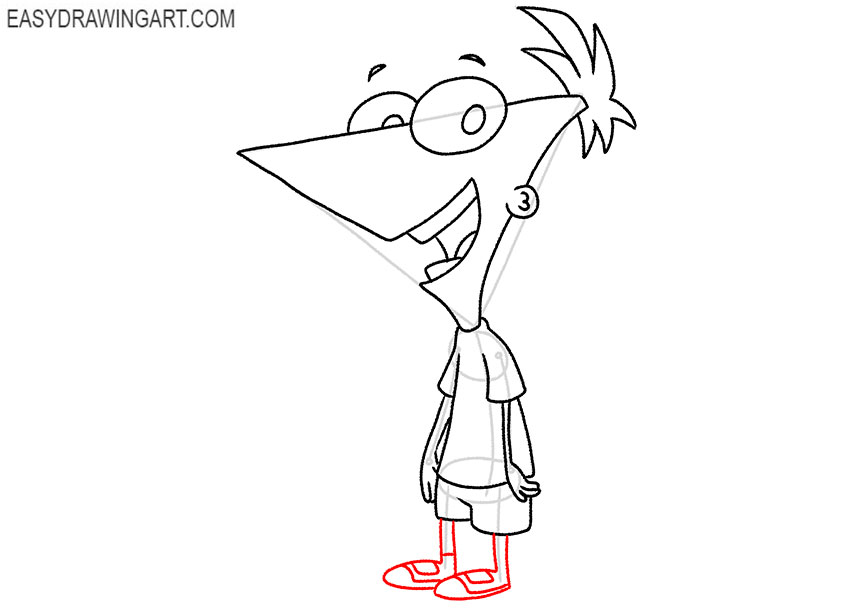
Step 9: Add the clothing details
Draw several horizontal stripes across the T-shirt of Phineas, curving each line slightly with the torso. Add the shorts pocket with a small curved outline, then refine the waistband and clothing edges.
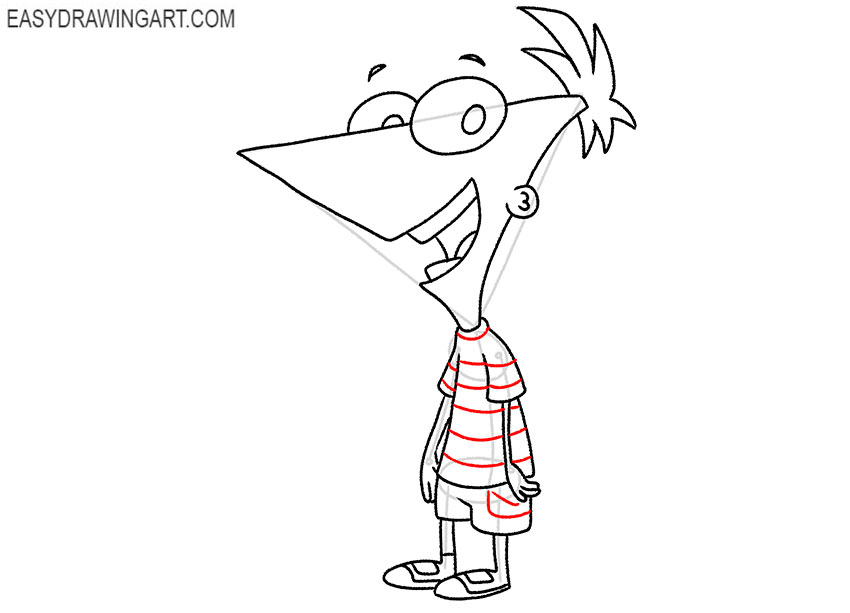
Step 10: Clean up the Phineas drawing
Erase the triangular head guide, body ovals, centerline, joint marks, and limb guides. Redraw any weakened contours around the body parts of the cartoon character.
Step 11: Color the Phineas drawing
Color Phineas’s skin light peach and fill the hair with red. Use beige and orange for the striped shirt, blue for the shorts, and muted blue and white for the sneakers.
Continue the Phineas and Ferb cast by drawing Ferb with his tall head and green hair, or try sketching Perry the Platypus in his familiar secret-agent pose.
It was a fascinating step-by-step tutorial, and now that you’ve finished drawing Phineas, try adding more characters from the series.
You can draw Ferb to complete the main duo, or continue with other animated favorites by drawing Perry the Platypus.
Try also to complete other interesting and useful lessons. You can learn about all the new products from our social networks. Subscribe and stay tuned.