How to Draw the Beast
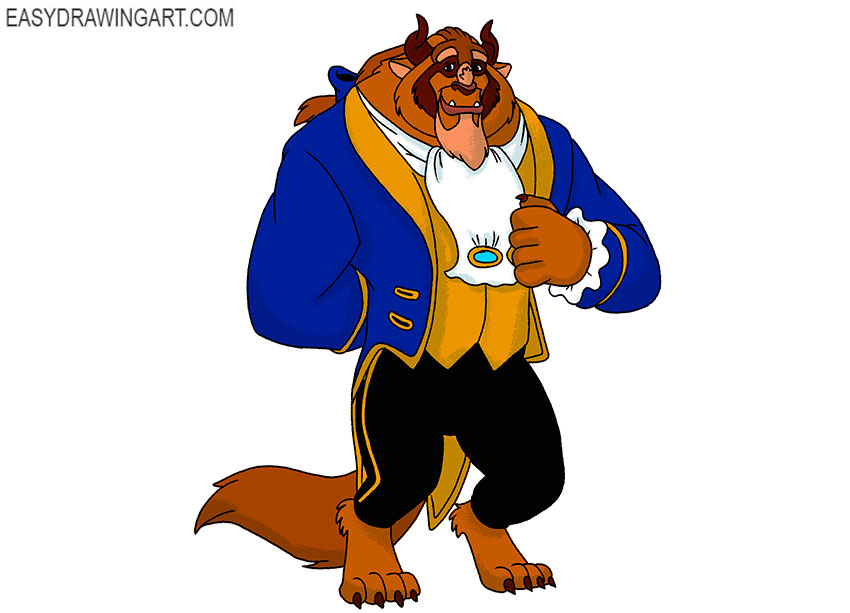
This step-by-step tutorial is about sketching one popular cartoon character – here you will learn how to draw the Beast. This is the hero of a wonderful full-length cartoon “Beauty and the Beast”.
Now you will draw the prince, whom the sorceress turned into the Beast as a punishment for his selfish and cruel manners. The monster is huge and dressed in an elegant costume.
Step 1: Outline the Beast’s head
Begin with the head by drawing smooth lines for the upper and lower sections of the face. Add the projecting muzzle and a simple outline for the broad nose at the front.

Step 2: Add the Beast’s torso construction
Sketch the rib cage and pelvis beneath the head using simple rounded forms. Connect them with a curved centerline that indicates the position and bend of the Beast’s torso.
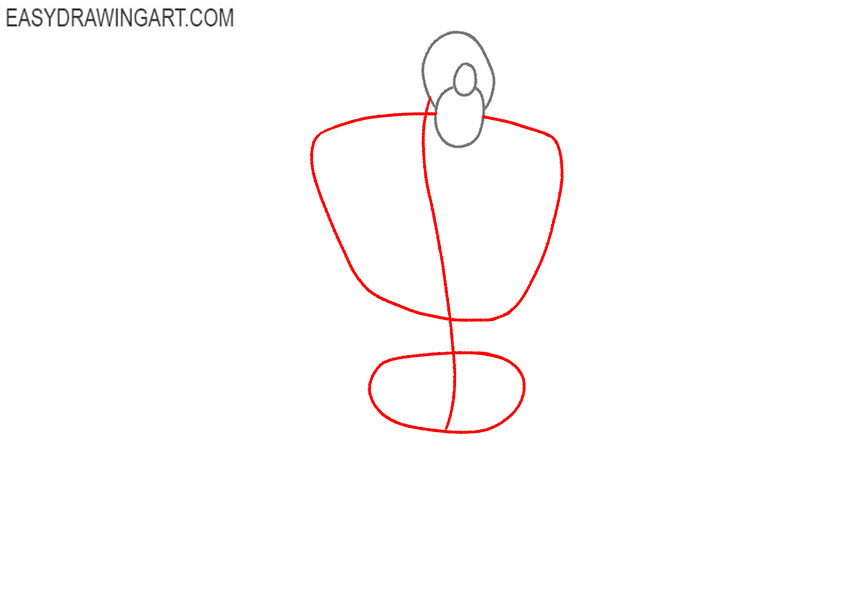
Step 3: Mark the Beast’s arms
Indicate both arms with thin lines extending from the shoulders. Place large circular marks at the shoulder and elbow joints, then add smaller guides for the wrists and hands.
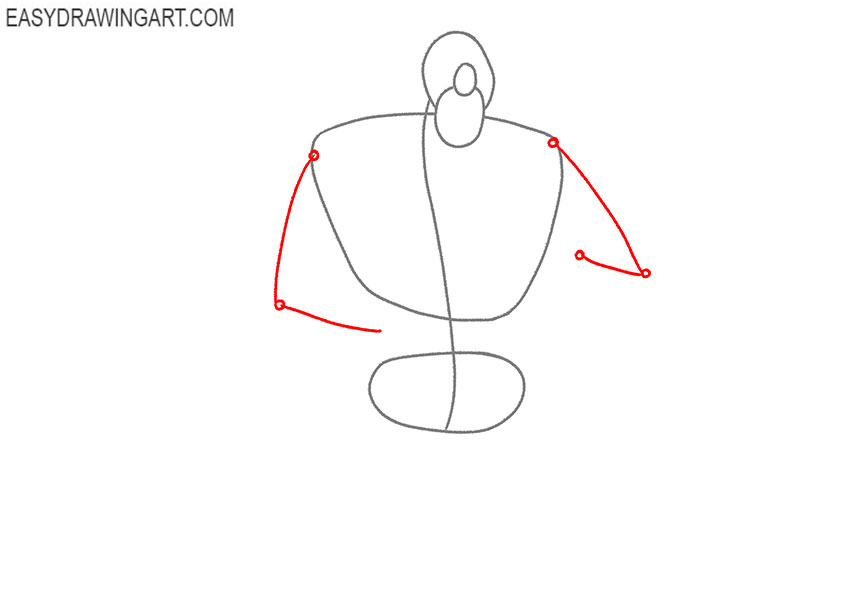
Step 4: Sketch the legs and tail
Use thin strokes to place the thighs, lower legs, and feet below the pelvis. Add circular marks at the knees, then draw one long curved guideline extending behind the body for the tail.
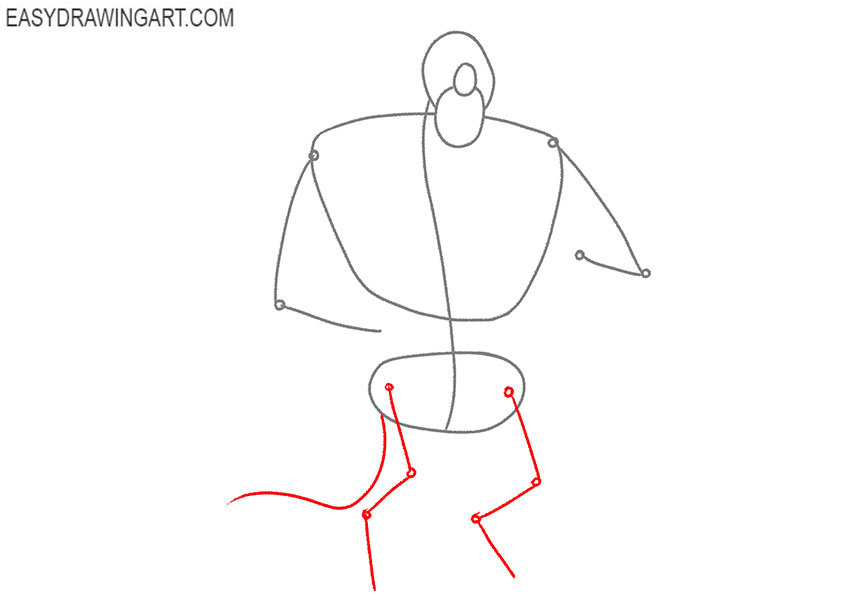
Step 5: Draw the Beast’s brows and horns
Refine the sides of the head with curved contours and add the heavy eyebrows above the eye area. At the crown, draw two short horns that curve upward and slightly outward.
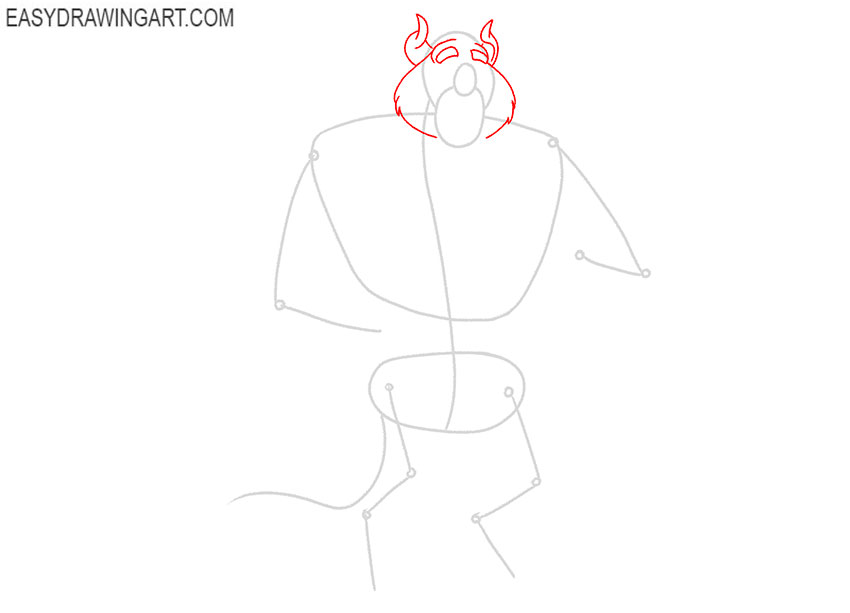
Step 6: Add the ears, forehead, and nose
Form the top of the head with several flowing curves and refine the fur along both cheeks. Draw the nose of the Beast more clearly, then add the large pointed ears on each side.
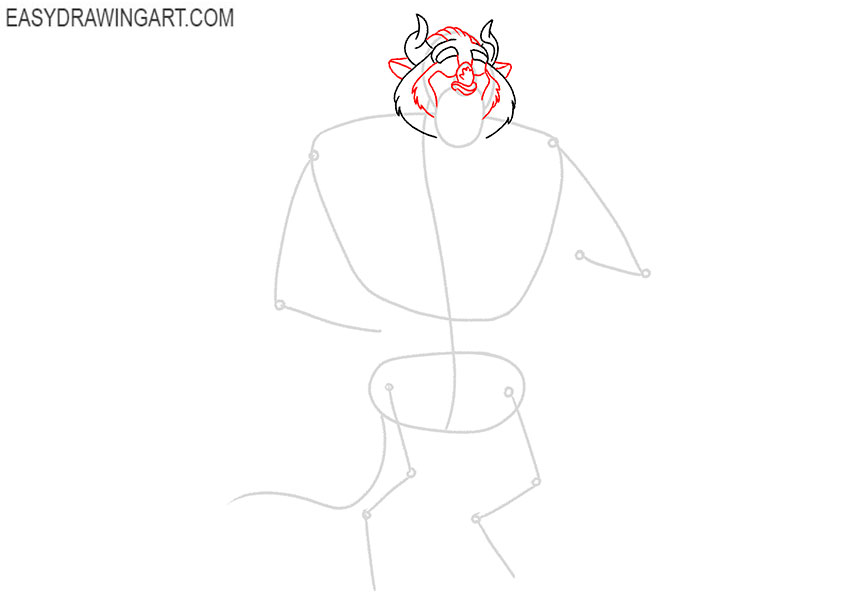
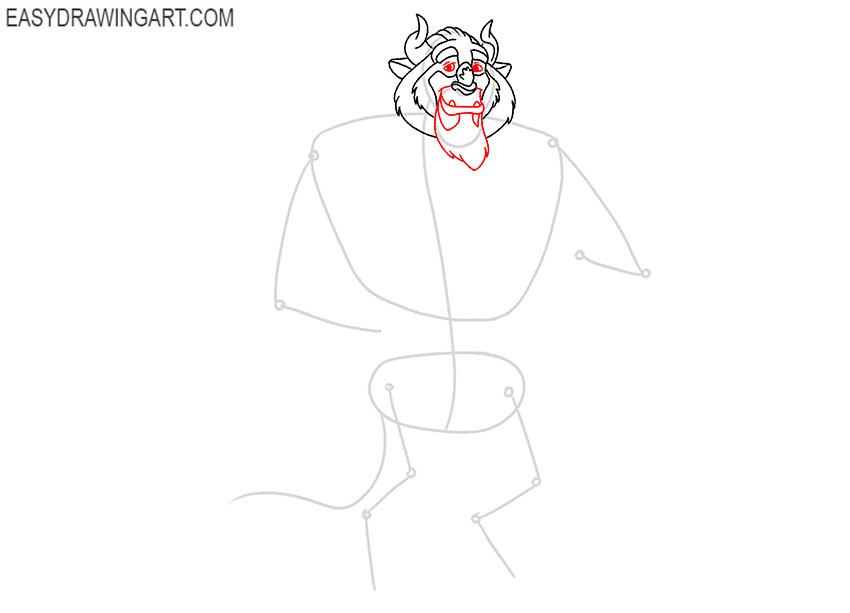
Step 7: Draw the Beast’s eyes, mouth, and beard
Draw the eyes beneath the thick brows, then outline the wide mouth and pointed fangs. Surround the lower face with long curved locks to form the Beast’s full beard.
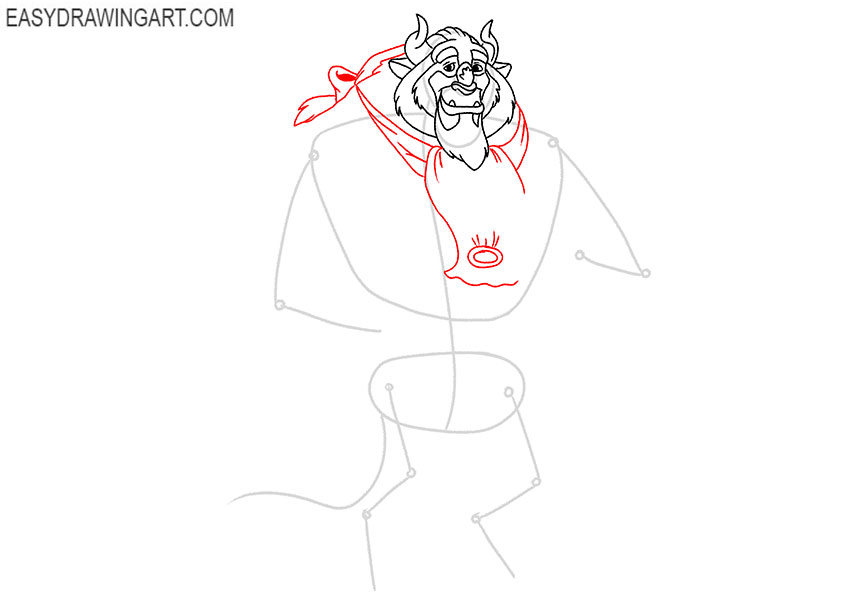
Step 8: Add the tied hair and neckwear
Draw the upper back and the long hair gathered behind the head. Add the tied ribbon around the hair, then outline the wide cravat wrapped around the Beast’s neck.
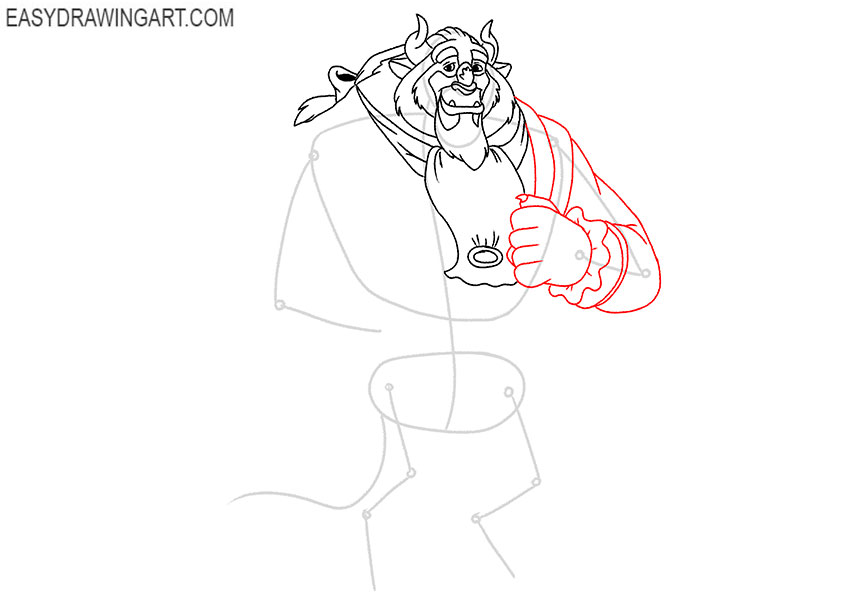
Step 9: Outline the first arm and clawed hand
Shape the first arm around the construction line and add the flared cuff at the wrist. Continue by drawing the hand with bent fingers and pointed claws.
Step 10: Draw the second arm and coat front
Use the remaining guide to outline the second arm, sleeve, and hand. Add the front edges of the formal coat across the torso, then draw the decorative loops along the chest of the Beast.
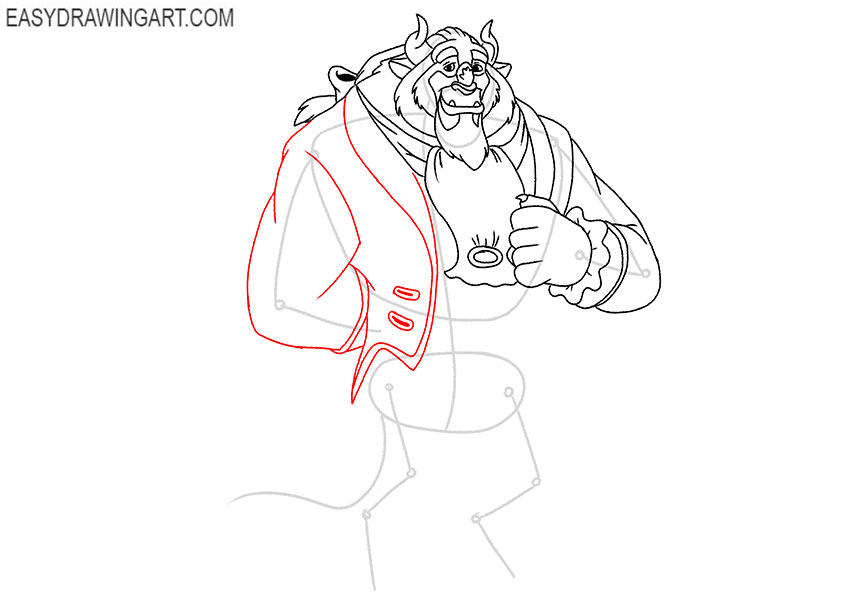
Step 11: Detail the vest and frock coat
Draw the visible vest beneath the coat of the Beast with several short lines and fitted edges. Complete the opposite side of the frock coat along the torso and extend it toward the waist.
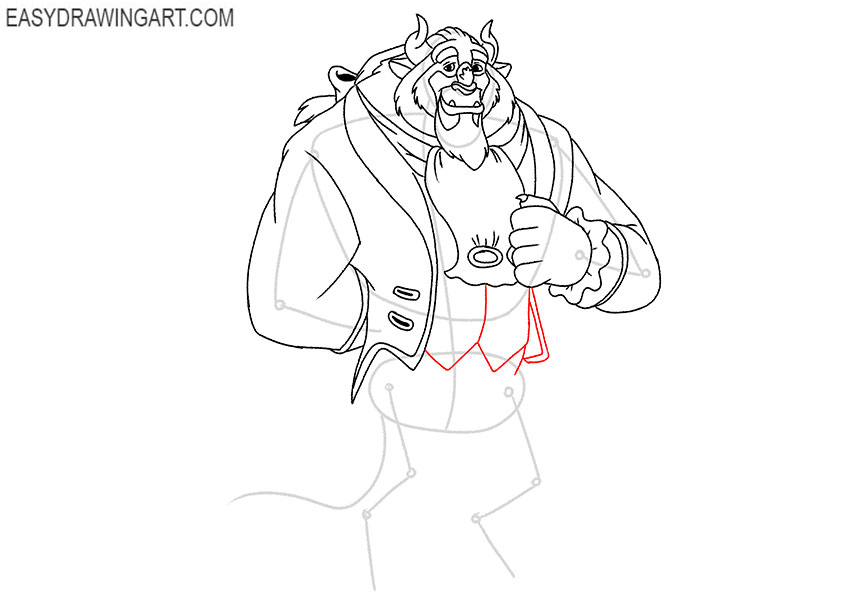
Step 12: Draw the first leg of the Beast
Build the first thigh and lower leg around the guideline, giving the limb its final thickness. Add the large animal-like foot at the bottom, then separate the toes and claws.
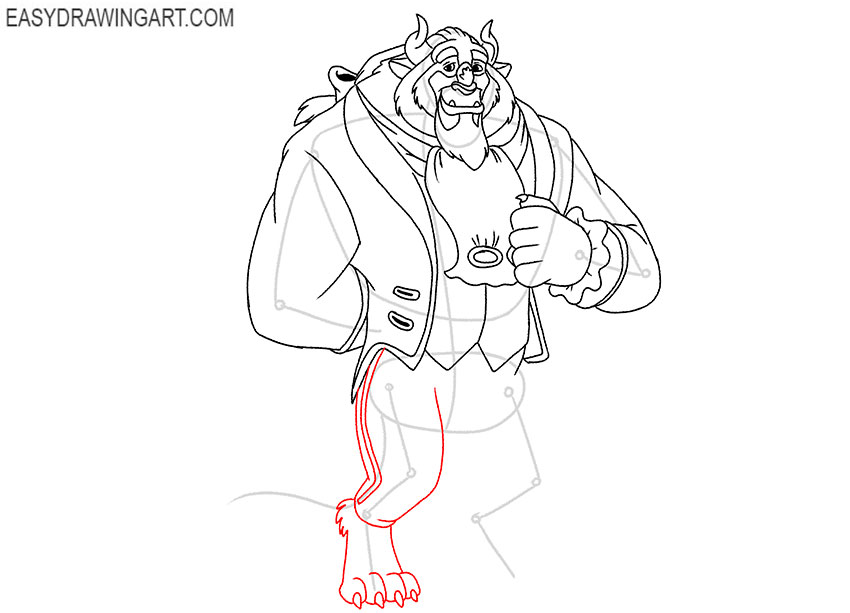
Step 13: Complete the Beast’s second leg
Shape the second thigh, knee, and lower leg around the construction marks. Finish the matching foot with broad toes and curved claws while preserving the angle of the stance.
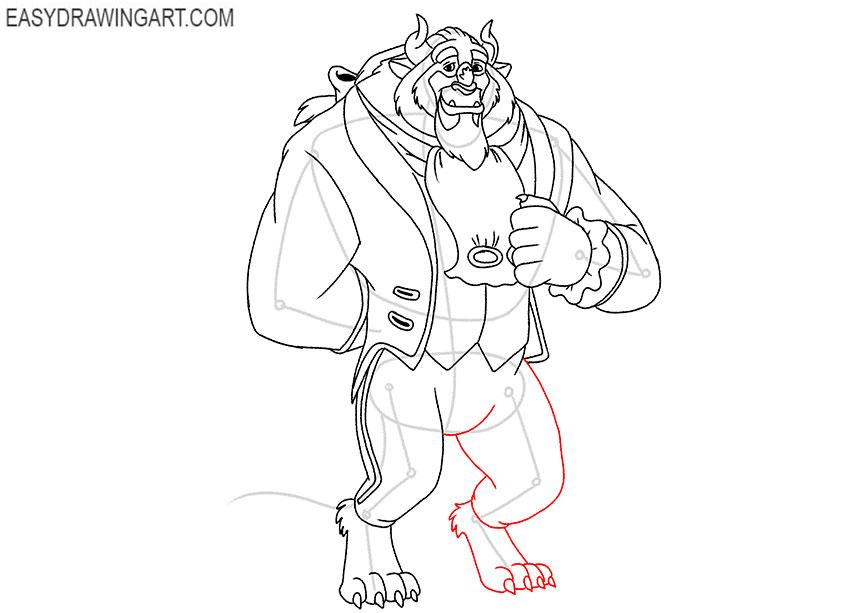
Step 14: Add the pointed tail and coat tails
Turn the tail guideline into a thick curved form with a pointed tuft at the end. Behind the legs, draw the long hanging coat tails with sweeping outer edges and curved lower folds.
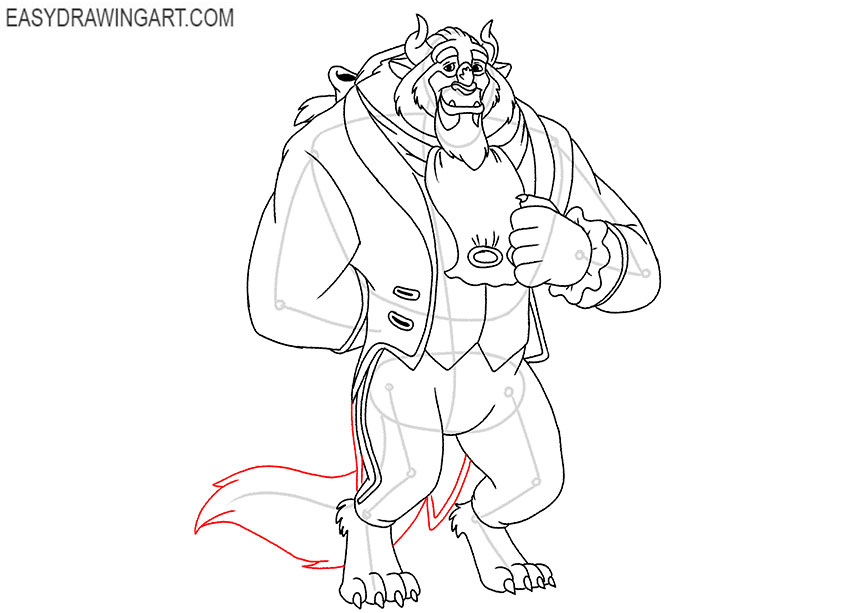
Step 15: Clean up the Beast drawing
Erase the remaining construction marks from the head, torso, arms, and legs. Strengthen the final contours of the fur, horns, face, clothing, hands, feet, and tail.
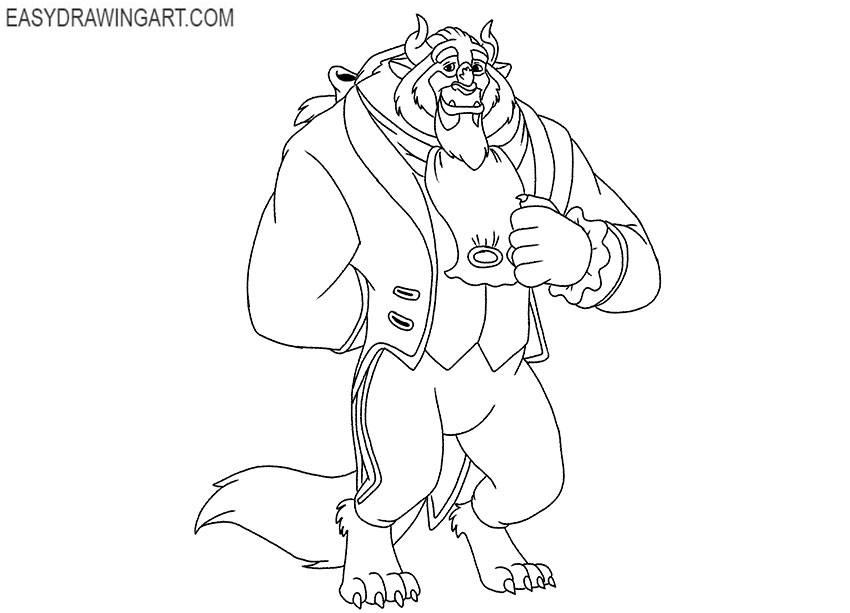
Step 16: Color the Beast
Apply several brown shades to the fur, horns, beard, and tail. Color the frock coat blue, the vest yellow, and the remaining clothing details with black and darker tones.
This ended another fascinating step-by-step guide where you learned how to draw a monster. Continue the Beauty and the Beast theme by drawing Belle or sketching a rose.
Let me know if you liked this tutorial. Your opinion is very important to us. Don’t forget to follow us on social media if you haven’t already.