How to Draw Black Widow
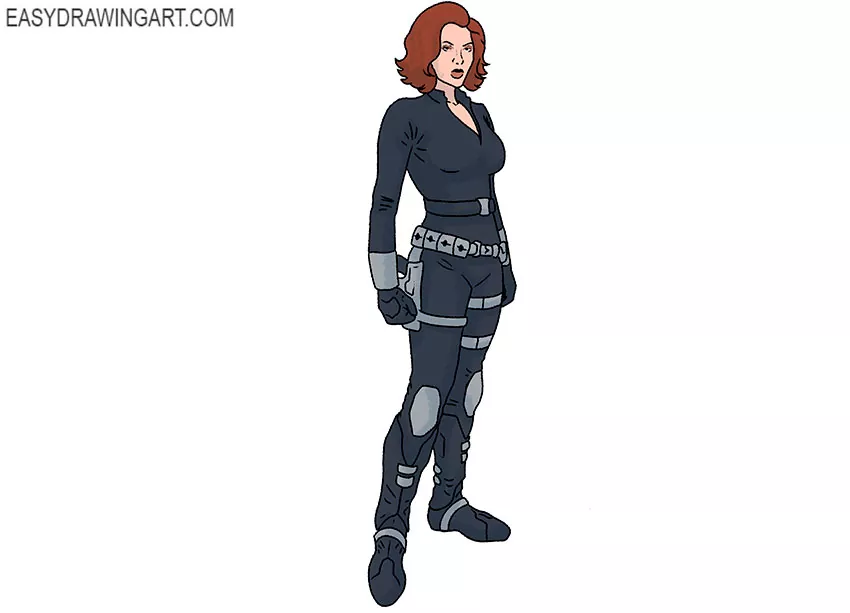
We are glad to present you an easy guide on popular characters, and show how to draw Black Widow step by step.
This girl is one of the best spies and professional assassins in the world. Black Widow has a slender build and thick, shoulder-length red hair.
In the drawing, the Black Widow is dressed in a tight-fitting black suit, with gloves on her hands. You can use the acquired skills in the future to create new beautiful drawings.
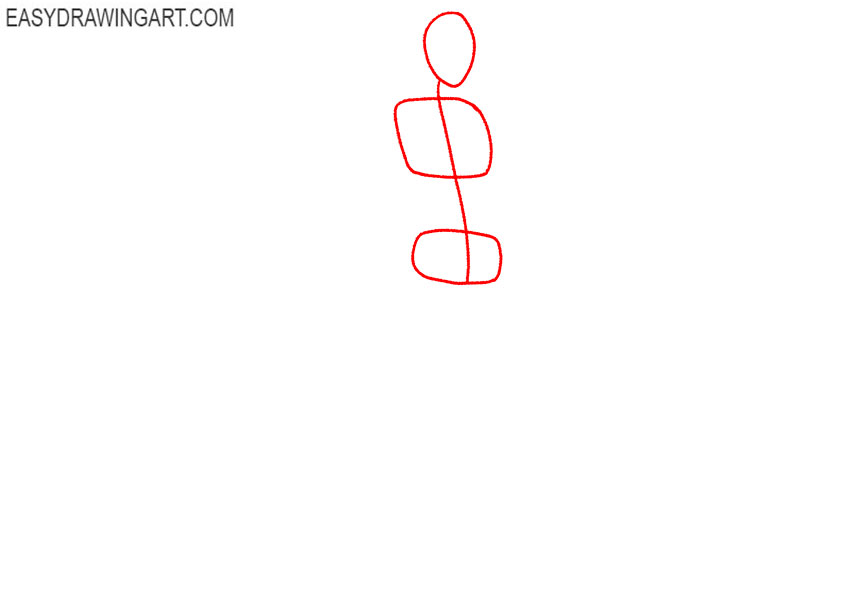
Step 1: Sketch the basic body construction
First, draw the head, chest, and pelvis as simple shapes to illustrate Black Widow’s skeleton. Add a simple central line through the torso to indicate the spine and direction of the body.
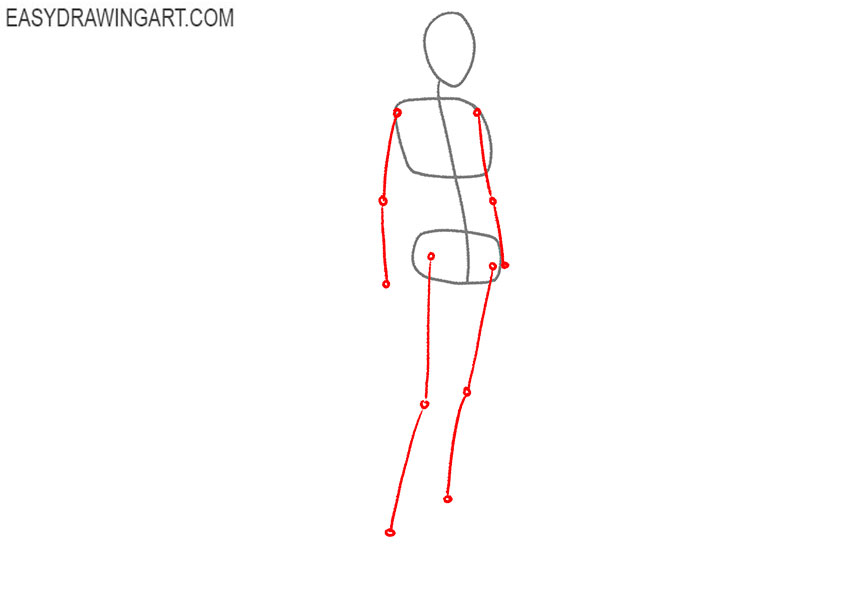
Step 2: Add the comic heroine arms and legs
Use thin lines to mark the positions of the arms and legs. Add small rounded shapes at the shoulders, elbows, knees, and other joints.
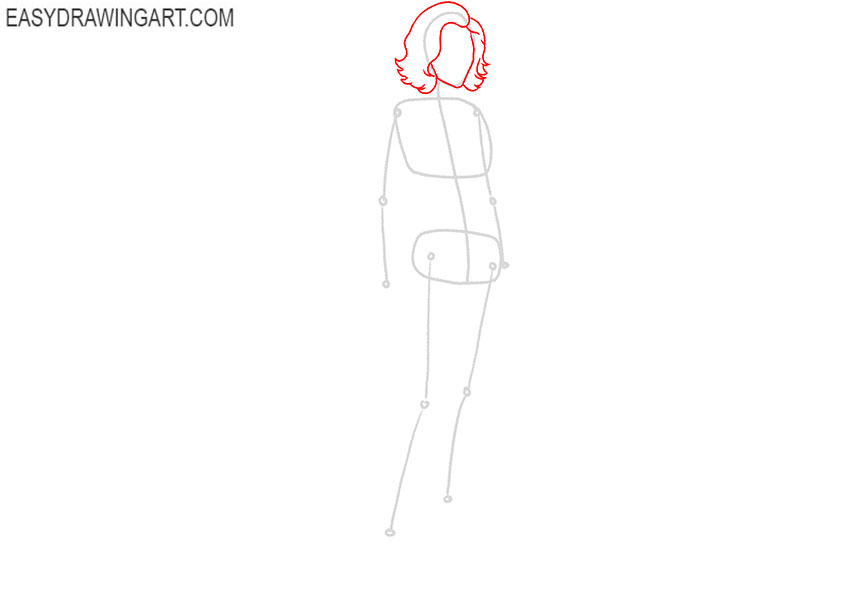
Step 3: Outline Black Widow’s head and hair
Use smooth lines to refine shape of the face and jaw. Draw Black Widow’s short, wavy hairstyle around the head, with separate curved strands along the sides.
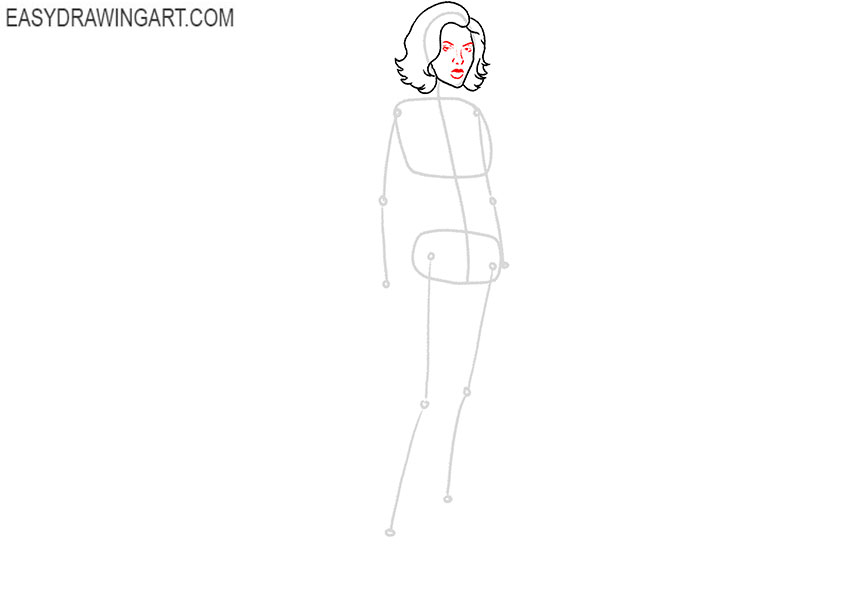
Step 4: Draw Black Widow’s facial features
Use the guidelines to draw the face, including the eyes, eyebrows, nose, and mouth. Keep the features aligned with the angle and shape of the head.
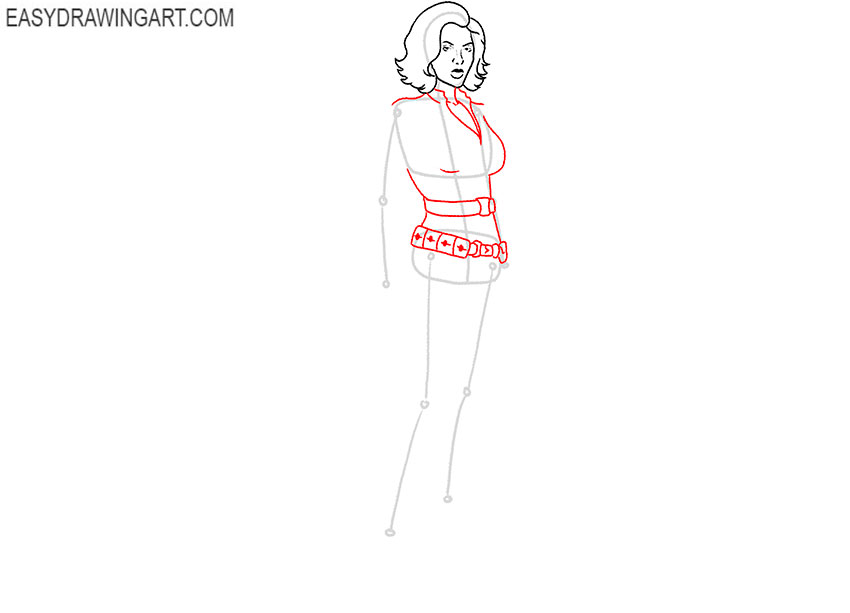
Step 5: Outline Black Widow’s torso and suit
Draw the shoulders and side contours of the torso around the construction shapes. Add the neckline of the tactical suit and outline the belt and equipment around the waist.
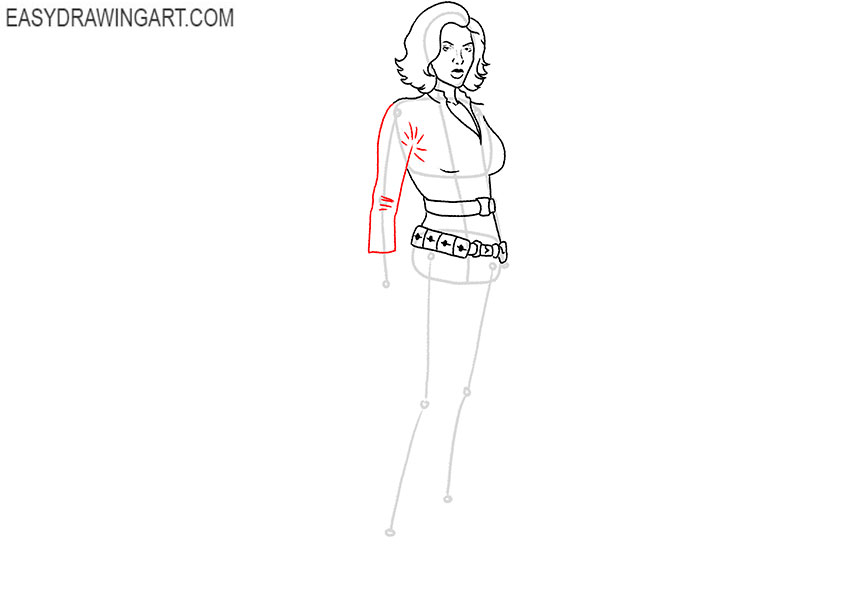
Step 6: Draw the front arm of Black Widow
Use the guidelines to draw the arm, elbow, and forearm with the correct thickness. Add several short folds to the fitted sleeve near the armpit and bent elbow.
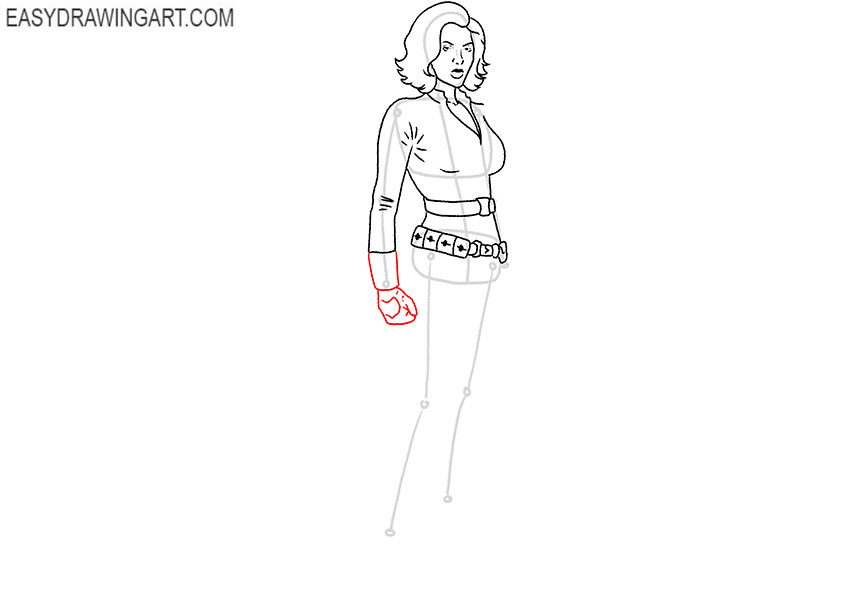
Step 7: Draw Black Widow’s clenched hand
Continue from the forearm to outline the wrist and glove. Then draw the hand with the fingers curled inward to form a clenched fist.
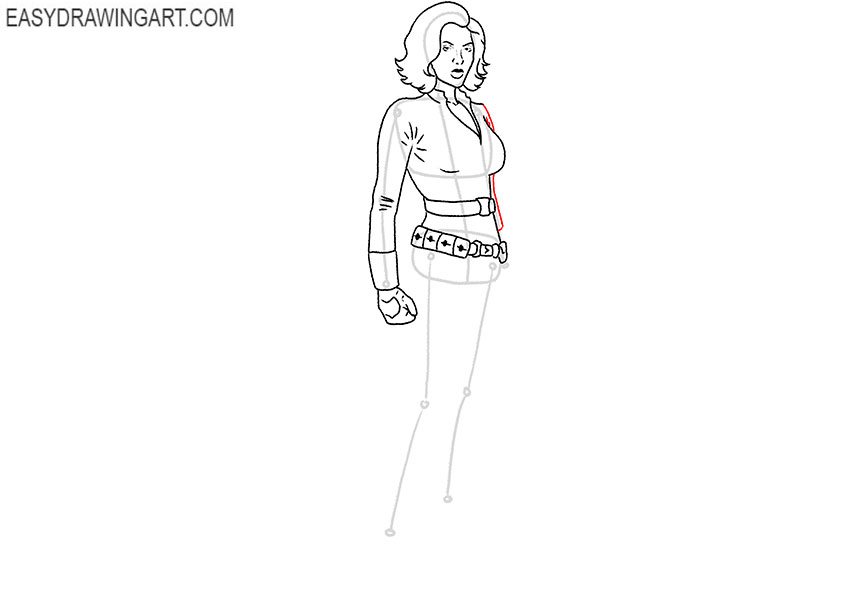
Step 8: Outline the second arm
Use the construction line to draw the visible upper and lower sections of the second arm. Shape the sleeve around the limb and add short folds near the elbow and armpit.
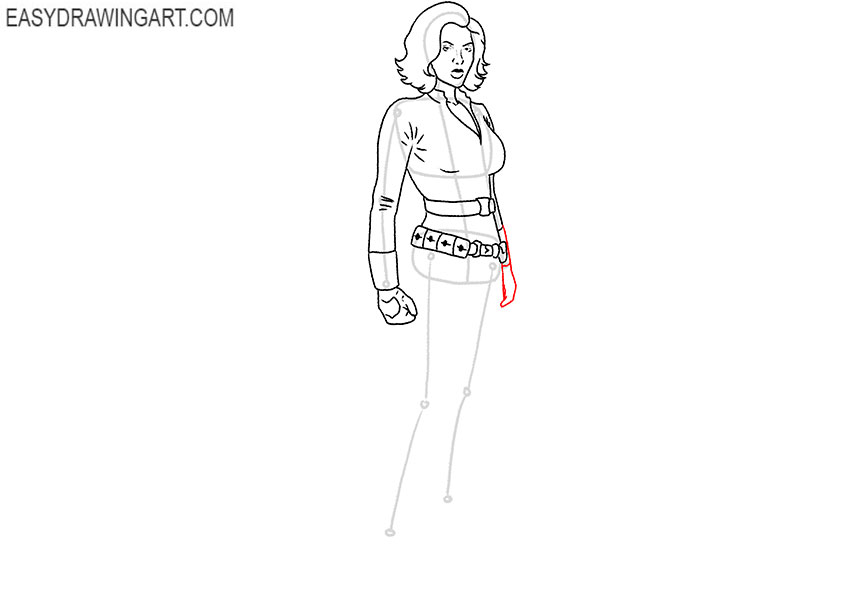
Step 9: Complete the second hand
Outline the wrist and glove at the end of the second arm. Draw the relaxed hand hanging beside the body, including the thumb and the slightly curved fingers.
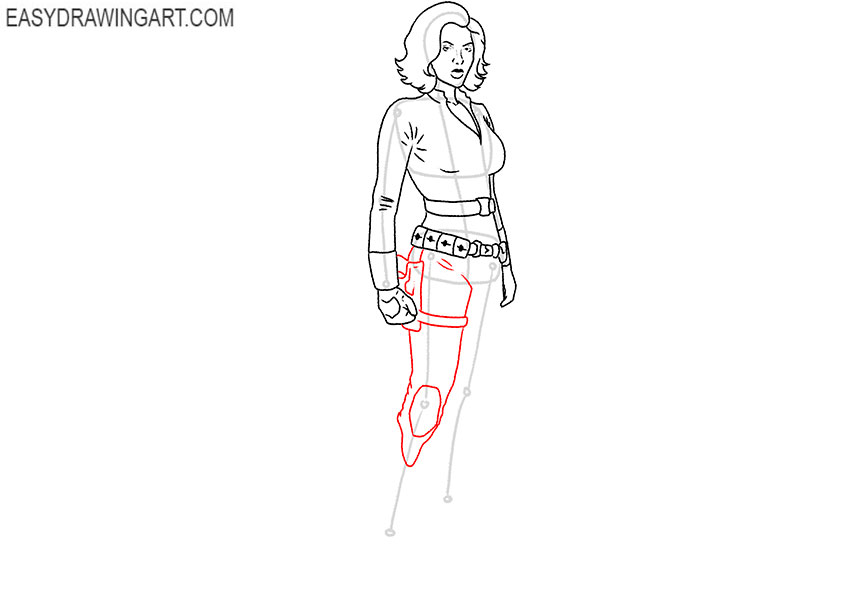
Step 10: Outline the front leg and thigh equipment
Use the guidelines to shape the first thigh and knee. Add the strapped equipment around the thigh, outline the knee pad, and draw several short folds in the tactical suit.
Step 11: Draw the front lower leg of Black Widow
Outline the lower leg from the knee to the ankle. Add the curved costume details around the shin, then draw the boot at the bottom.
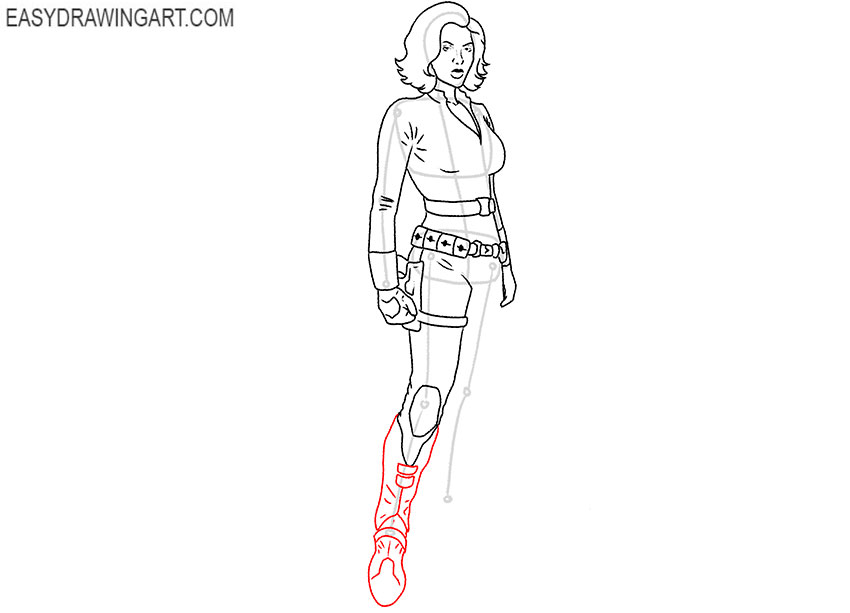
Step 12: Draw the top of the second leg
Follow the construction line to outline the second thigh and knee with the correct thickness. Draw the equipment of Black Widow attached to the thigh and add the second knee pad.
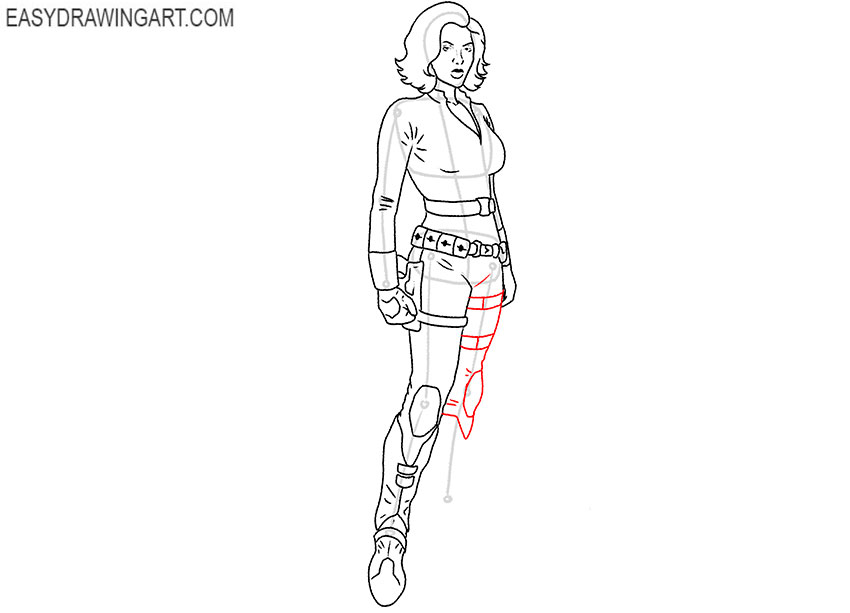
Step 13: Complete the second leg and boot
Draw the second lower leg of Black Widow from the knee to the ankle. Add the curved details around the shin, then outline the matching boot with a thick sole and rounded toe.
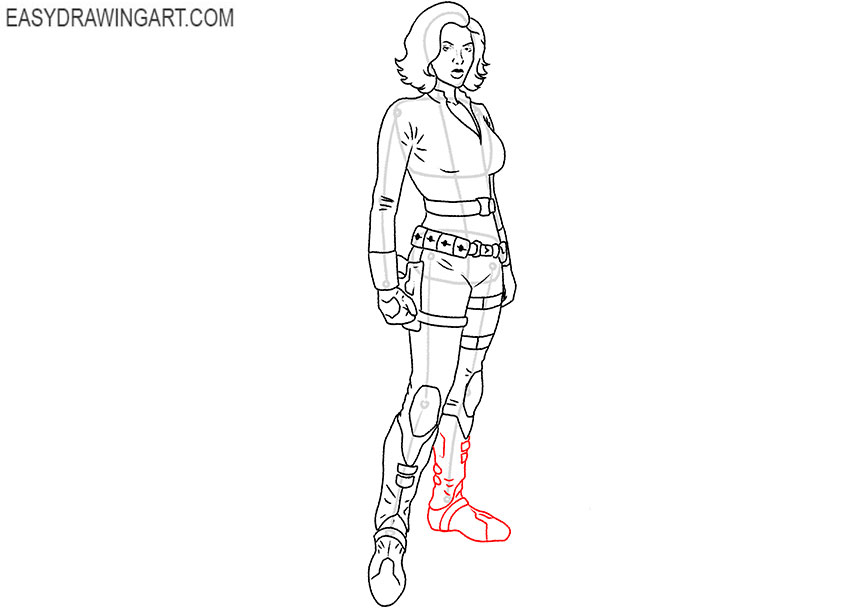
Step 14: Clean up the Black Widow drawing
Erase the remaining construction lines from the head, torso, arms, and legs of the comic book heroine. Refine the hair, facial features, tactical suit, gloves, equipment, knee pads, and boots.
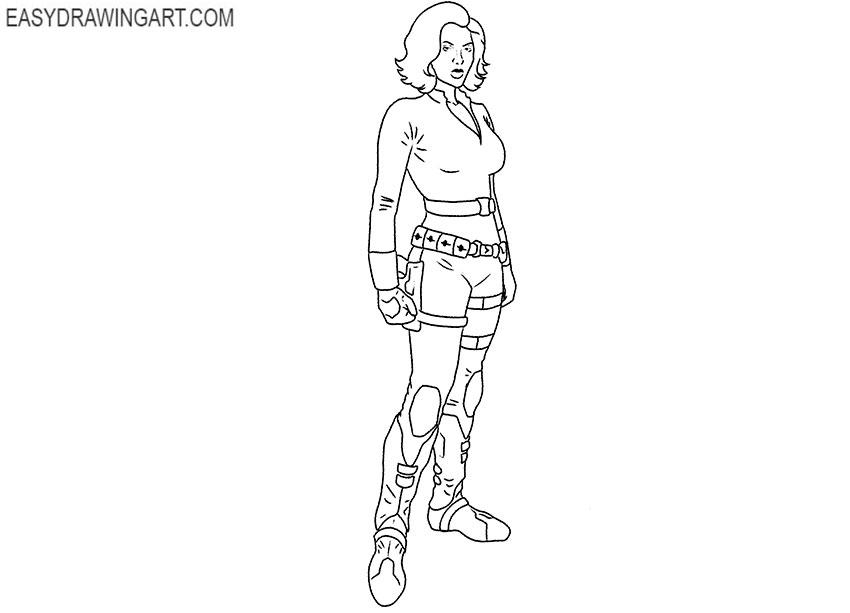
Step 15: Color the Black Widow drawing
Color the skin with a light beige tone and make the hair reddish brown. Use several shades of dark gray for the tactical suit, gloves, equipment, knee pads, and boots.
Now another drawing tutorial has come to an end. Continue drawing Marvel heroes by drawing Captain America or sketching Hawkeye.
Write if you liked this step-by-step guide. Your feedback motivates us a lot. Don’t forget to follow us on social media if you haven’t already.