How to Draw Black Adam
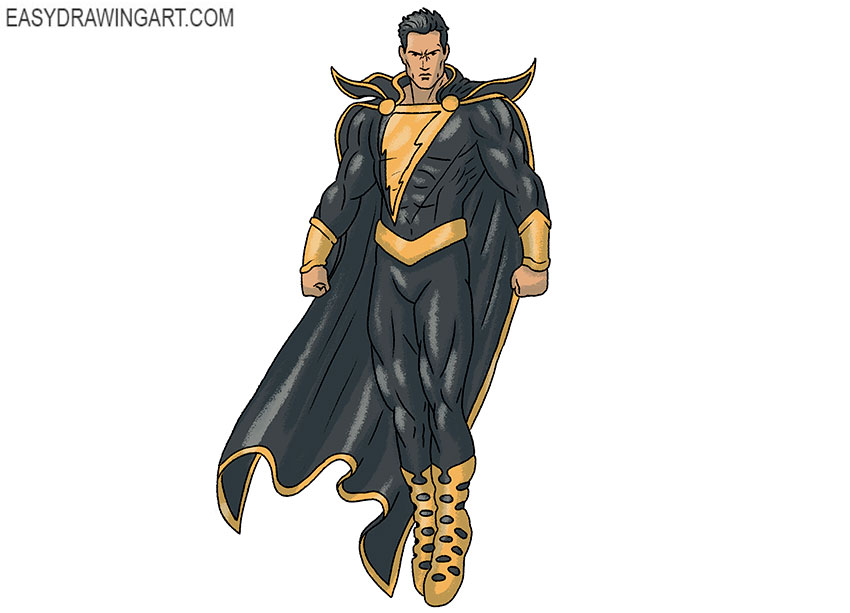
So, we have prepared for you detailed instructions on how to draw Black Adam. This is a character from comics published by DC Comics.
Black Adam has tremendous strength, stamina, and speed. With the help of mystical energy, Black Adam can fly.
In the process of work, try to keep the proportions and carefully draw all the lines so that in the end the character is easily recognizable. We wish you creative success!
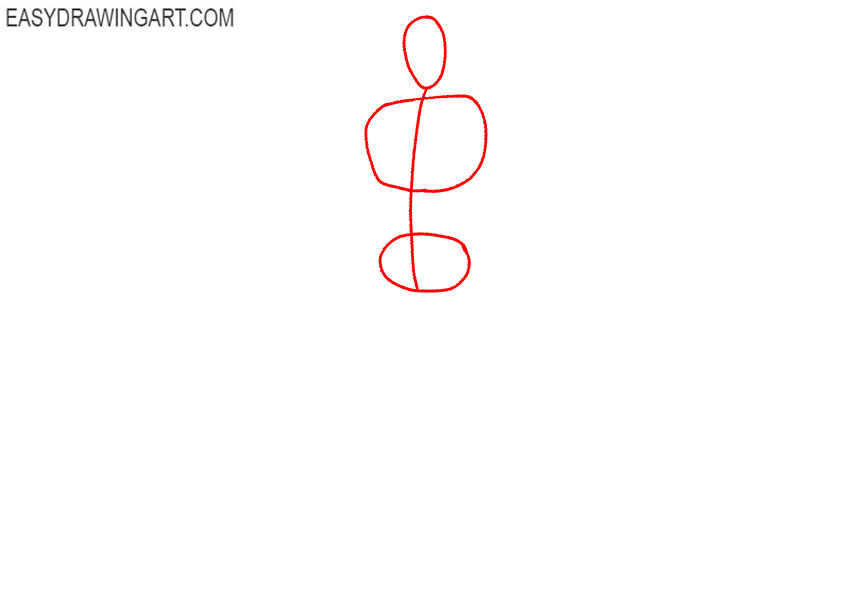
Step 1: Build the basic Black Adam figure
Sketch the head, rib cage, and pelvis with simple geometric shapes. Run a smooth centerline through the torso to show the curve of Black Adam’s body and the direction of his stance.
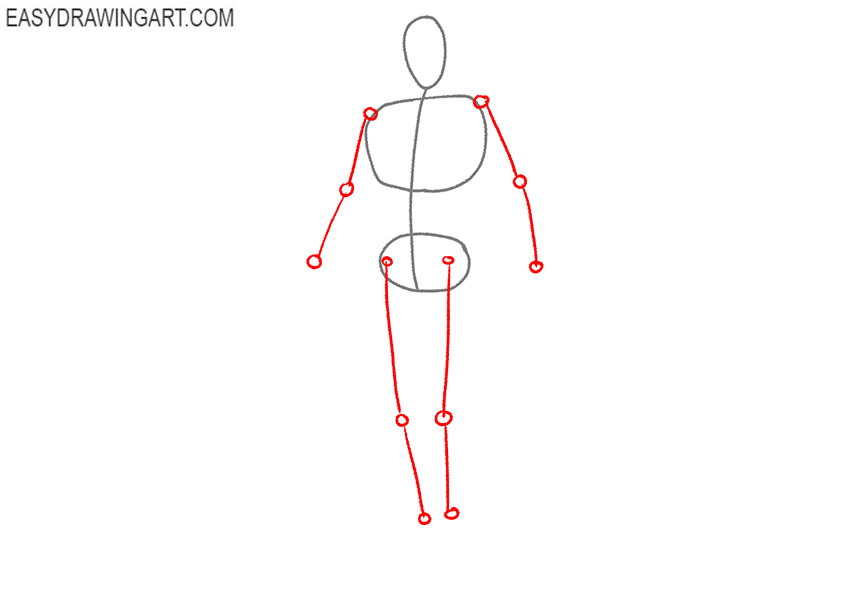
Step 2: Map out Black Adam’s limbs
Mark the arms and legs with thin straight lines, following the angle of the body. Add small dots at the shoulders, elbows, knees, and other joints to define the limbs.
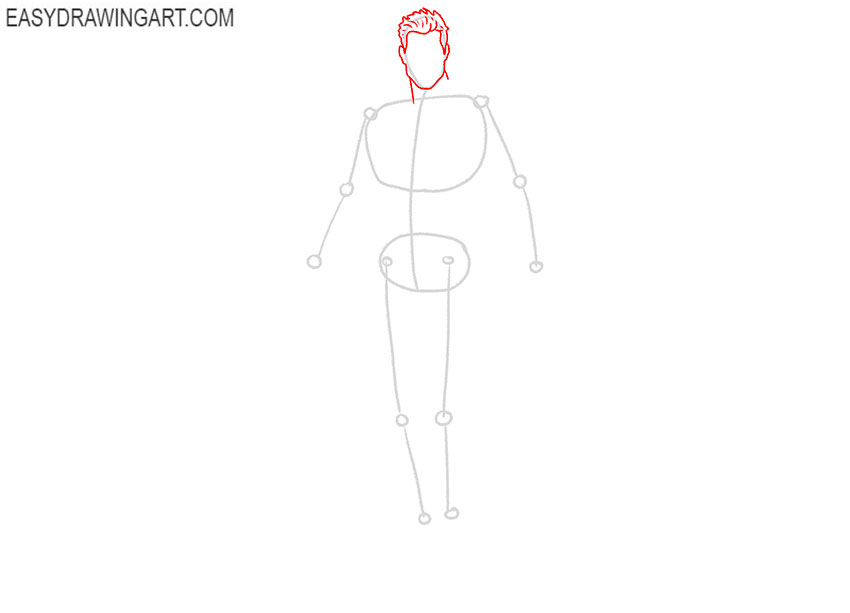
Step 3: Draw Black Adam’s head and hair
Trace the outer contour of the head around the construction shape and form the jaw. Draw the ears of Black Adam, then add the short hair with several pointed strands along the forehead and crown.
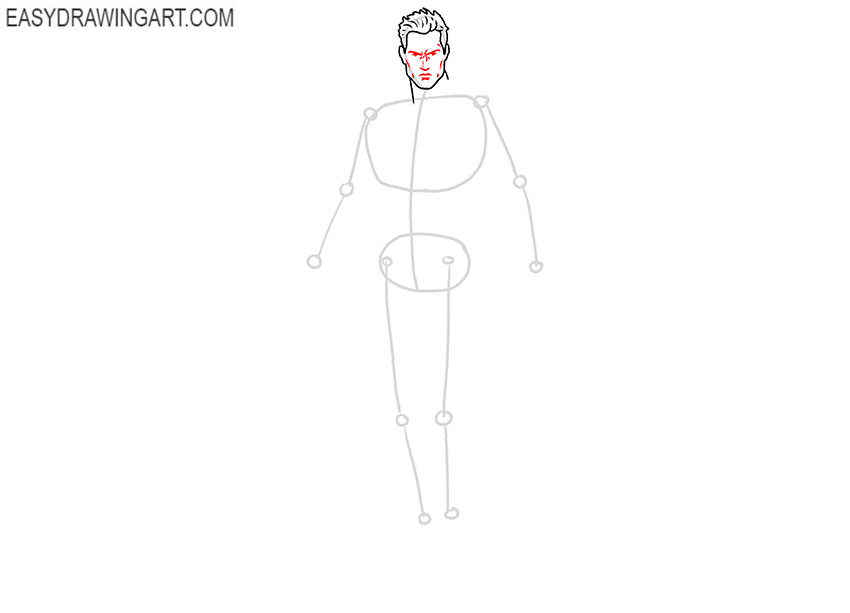
Step 4: Draw Black Adam’s facial features
Draw the eyes, eyebrows, nose, and mouth within the facial guidelines. Use short curved strokes around the eyes and cheeks to define the brows and cheekbones.
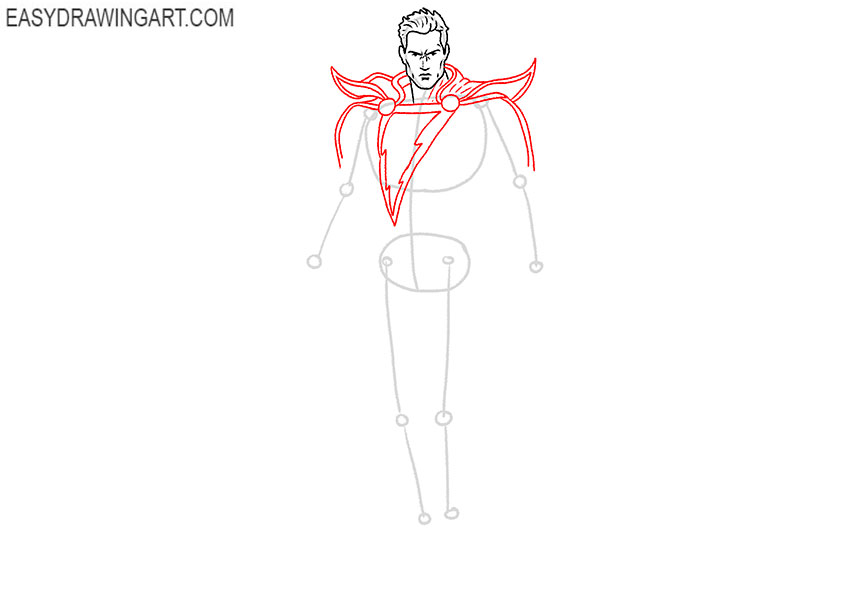
Step 5: Add the collar and lightning emblem
Draw the wide collar of Black Adam around the neck and extend the pointed sections over the shoulders. In the center of the chest, outline Black Adam’s large angular lightning emblem.
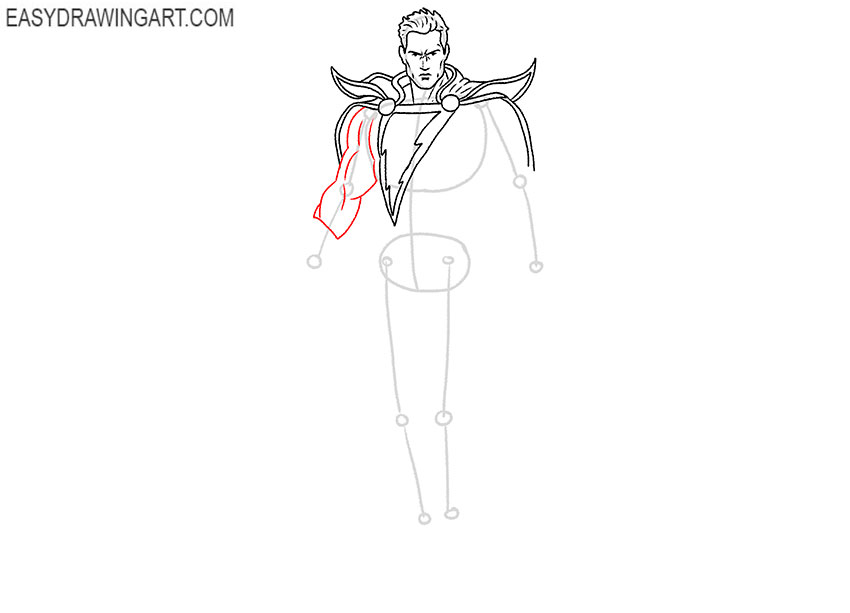
Step 6: Outline the first muscular arm
Use the construction lines to shape the first shoulder, upper arm, elbow, and forearm. Define the major muscle forms and add a few broad folds where the fitted suit bends.
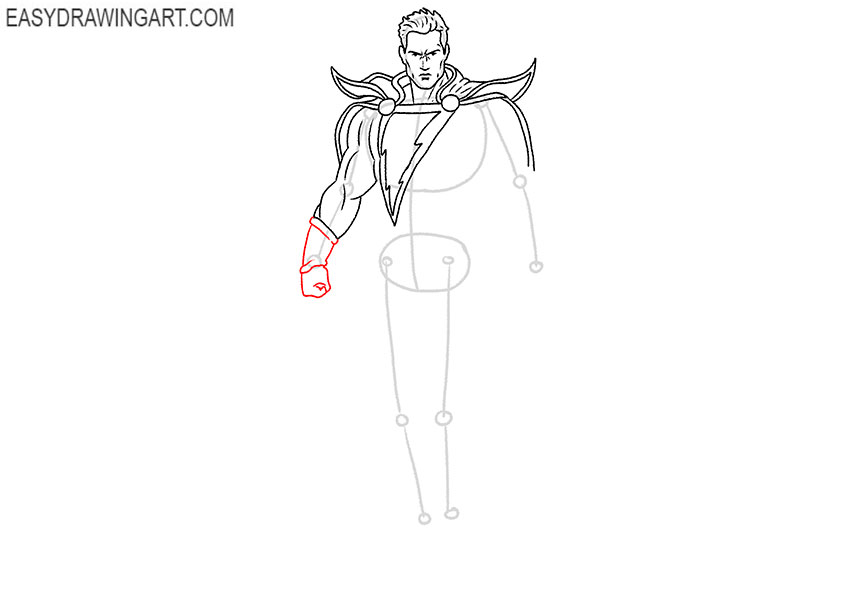
Step 7: Draw the first wrist guard and fist
Extend the forearm into a wide wrist guard, then draw the hand below it. Curl the fingers inward and define the knuckles to form a firm clenched fist.
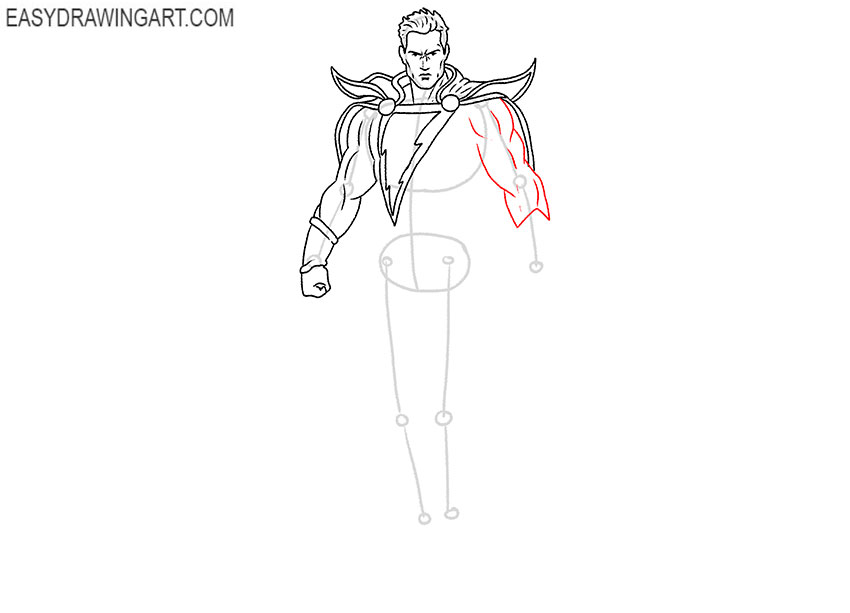
Step 8: Form the second arm
Follow the remaining guideline to shape the second shoulder, upper arm, elbow, and forearm. Show the muscle structure of the superhero with curved contours and add short folds near the joints.
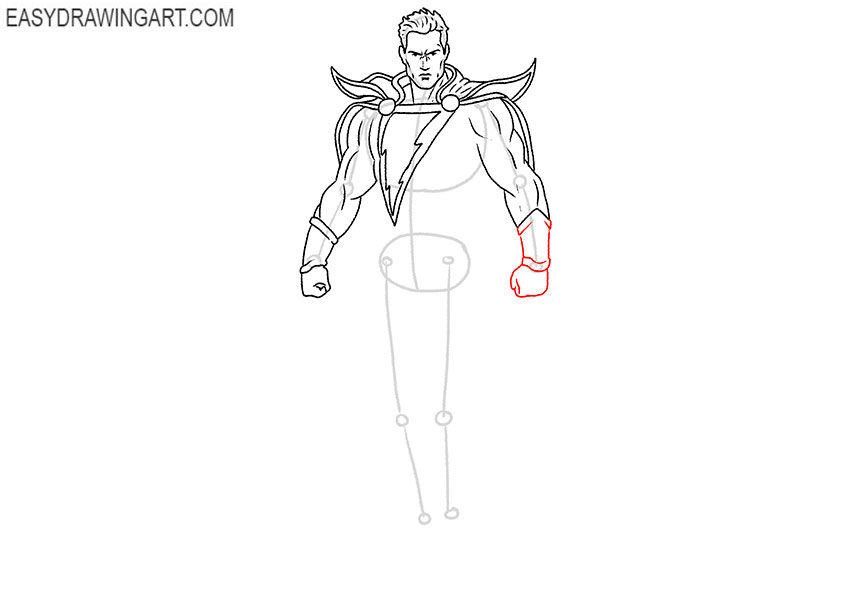
Step 9: Complete the second wrist guard and fist
Add the broad wrist guard at the end of the second forearm. Draw the hand of Black Adam beneath it with the fingers folded into the palm, then define the thumb and visible knuckles.
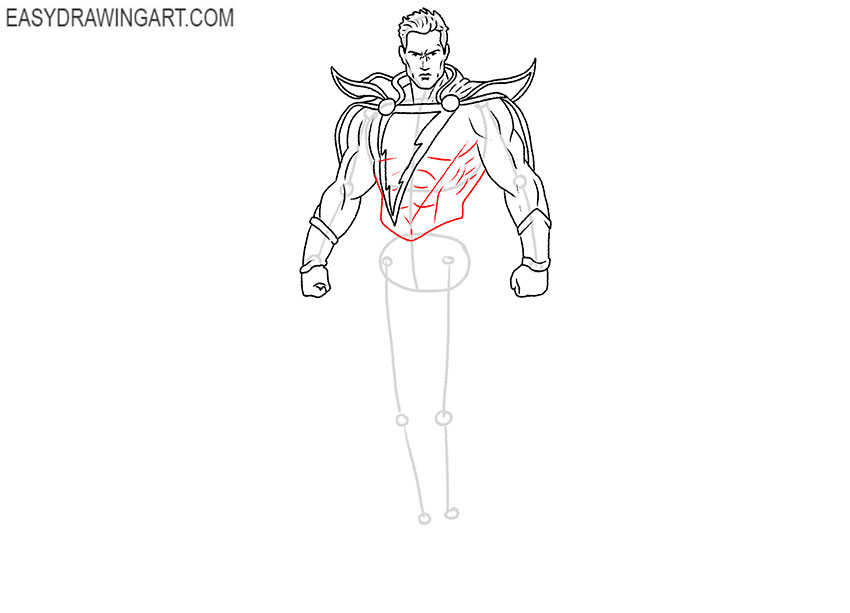
Step 10: Draw Black Adam’s chest and abdomen
Outline the sides of the chest and abdomen around the original torso shapes. Use smooth lines to indicate the pectoral muscles, ribs, abdominal forms, and folds in the suit.
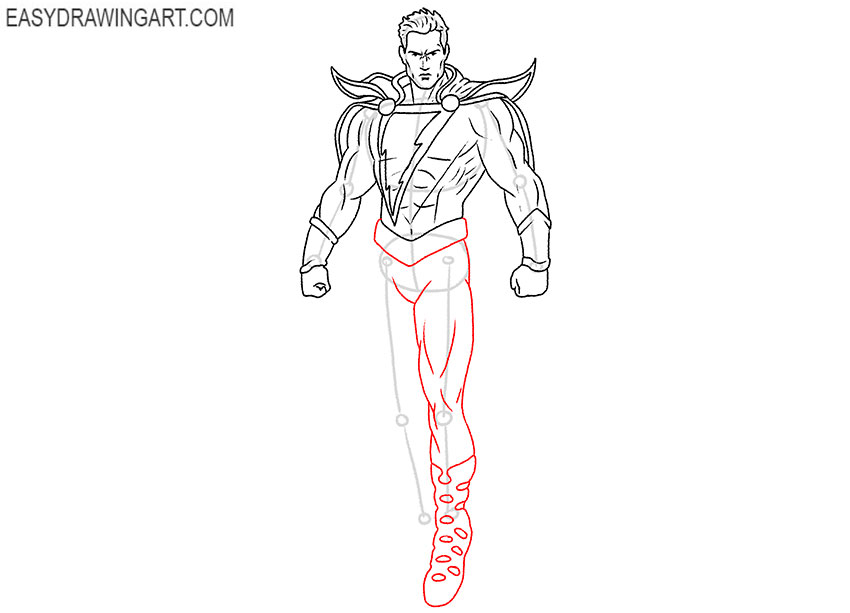
Step 11: Draw the front leg, belt, and boot
Shape the first thigh, knee, and lower leg around the guideline. Add the wide belt at the waist, then draw the high boot around the foot.
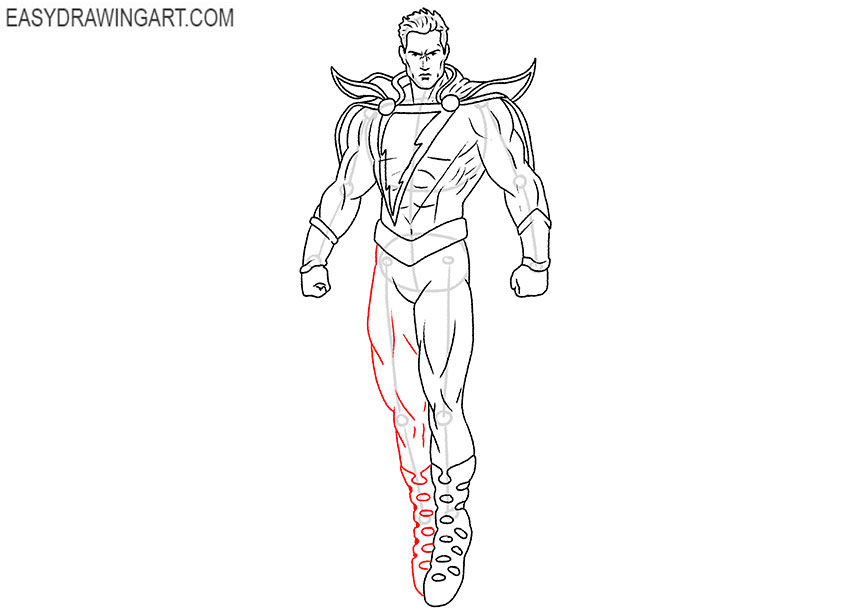
Step 12: Finish the second leg and boot
Outline the second thigh, knee, shin, and calf using the remaining construction line. Add the muscle contours and complete the matching high boot around the foot.
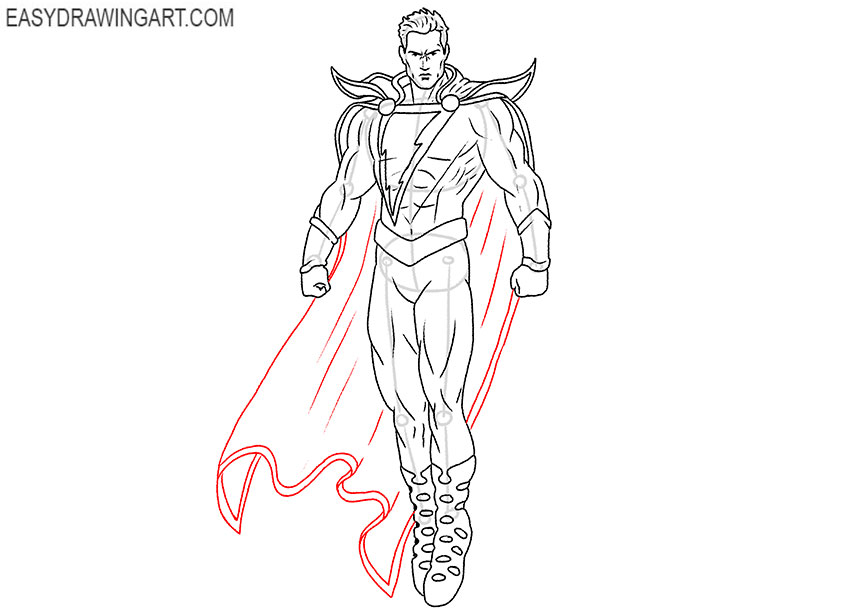
Step 13: Draw Black Adam’s cape
Draw the wide cape falling behind the shoulders and legs. Use long smooth contours along the sides, then form the lower edge with a series of broad curved folds.
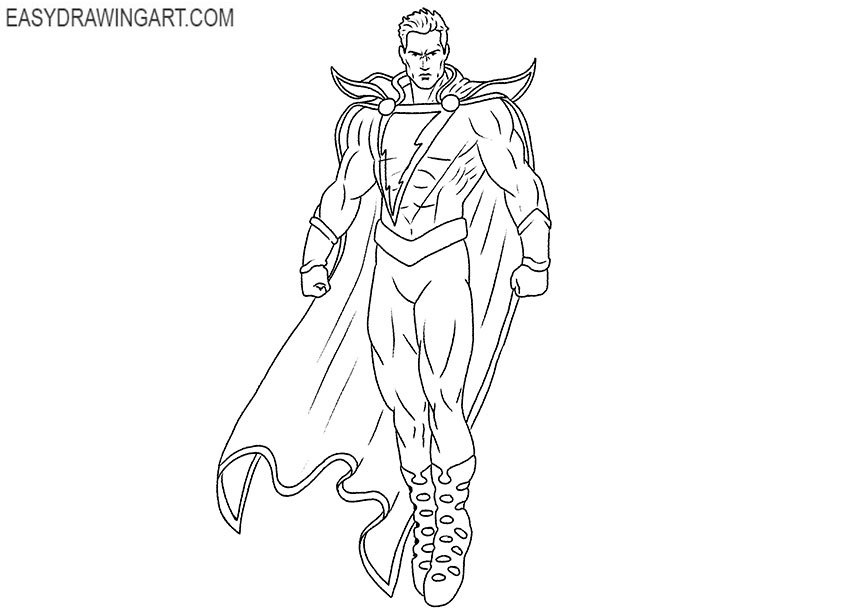
Step 14: Remove the construction lines
Erase the remaining guides from the head, torso, arms, and legs. Refine the face, lightning emblem, muscular contours, wrist guards, belt, boots, and cape into clean linework.
Step 15: Color the Black Adam drawing
Use a light beige tone for the skin and black for the hair. Color the suit and cape with black and dark gray, then apply yellow to the lightning emblem, trim, and wrist guards.
This is the end of another step-by-step drawing tutorial. Black Adam is finished. Continue with another DC character by drawing Robin or sketching Superman.
We hope that you did good work at each stage of drawing, and you got a great drawing. If you want to be aware of all the new products, be sure to subscribe to us on social networks.