How to Draw an Apple
This tutorial will be a basic one for many artists, because today the EasyDrawingArt team will show you how to draw an apple easily and simply.
As soon as a novice artist picks up a pencil, one of the first things they are likely to draw is an apple.
But does everyone draw apples correctly?
Most likely not. And in this very simple seven-step lesson, we will show you how to sketch this fruit in a way that even the most inexperienced artist can do it correctly.
How to draw an apple step by step
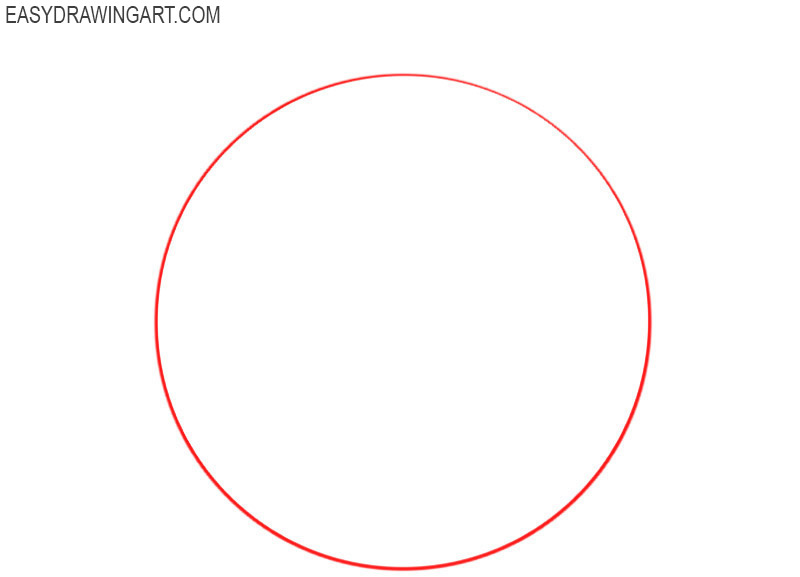
Step 1: Sketch a simple round fruit shape
All our drawing lessons start with simple geometric shapes, and the tutorial on how to draw an apple is no exception. An apple is a fairly simple object based on a basic circle. So, draw a circle that does not have to be perfectly even.
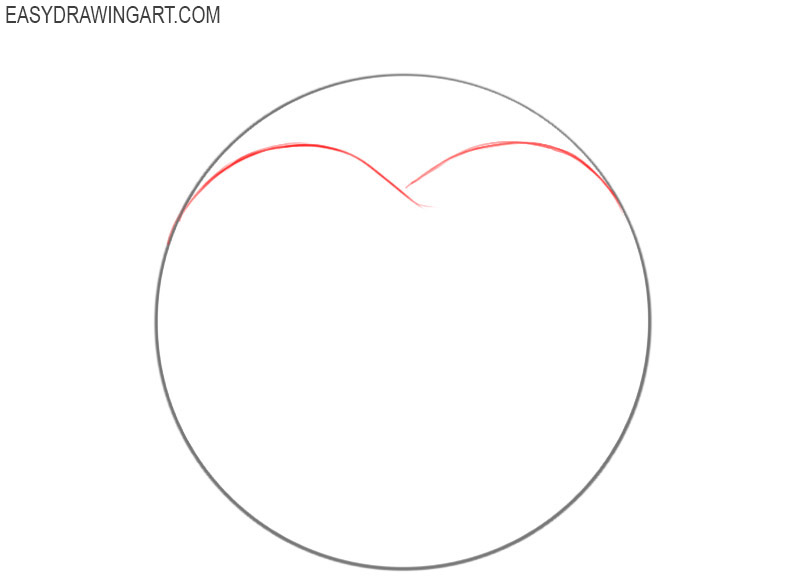
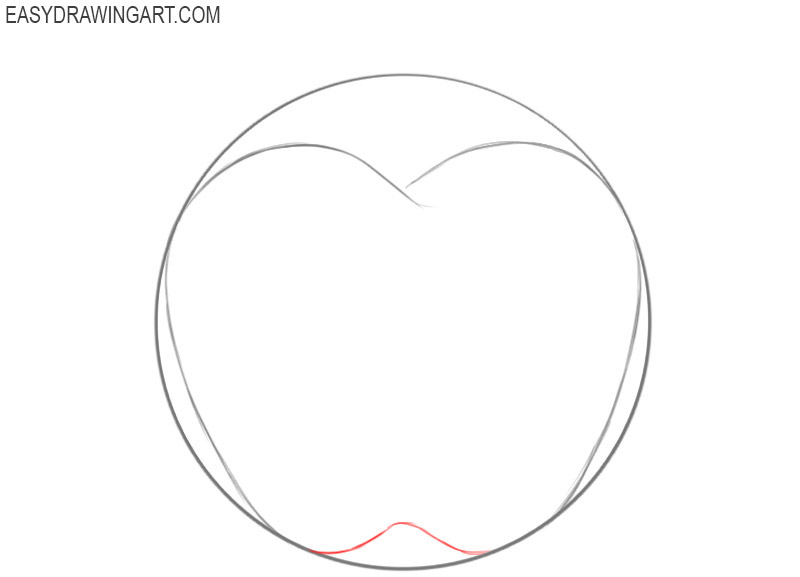
Step 2: Draw the upper apple edges
Now let’s start giving our apple sketch a more natural look. Let’s start from the top of the fruit by drawing the outlines of the upper edge using two simple curved lines. These two smooth lines should meet neatly in the center.
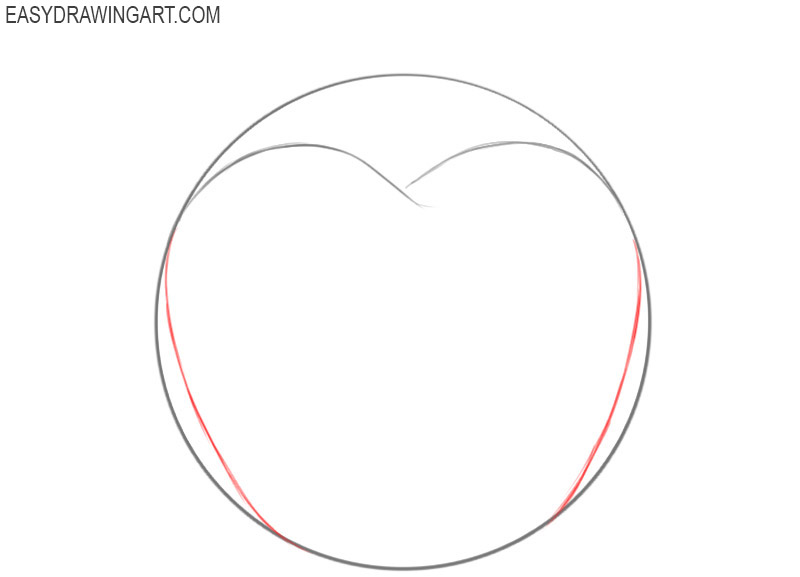
Step 3: Narrow the sides slightly
Apples are rarely perfectly round, right? In the third step, we will make our apple drawing look more natural by giving it a more realistic shape. To do this, draw two lines on the sides, slightly narrowing the contours of the fruit.
Step 4: Draw the bottom apple indent
In the fourth step, we will complete the basic shape of the apple. Using a line similar to the capital letter W, form the bottom part of the apple. The shapes of apples can vary, so the outline and the depth of the bottom plane may also differ in your drawing.
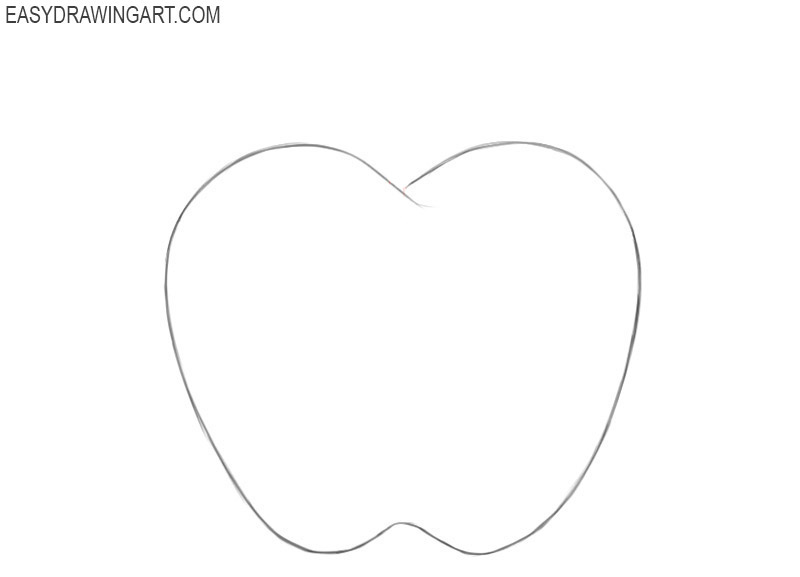
Step 5: Clean up the apple drawing
Now it’s time to use an eraser. Take this simple tool and remove the unnecessary lines that we created in the first step. Your apple drawing should now look something like this. Your apple drawing does not have to be perfectly symmetrical or perfectly shaped, but make sure the outlines are not overly uneven.
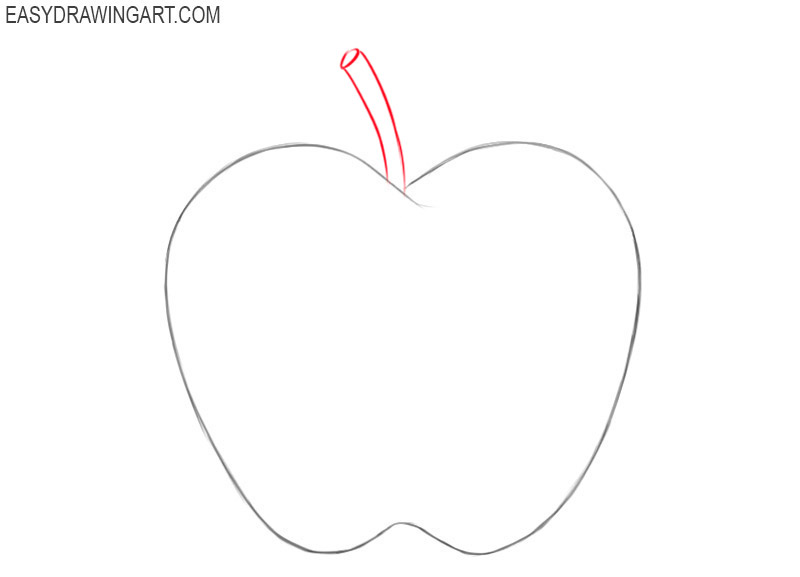
Step 6: Draw the curved apple stem
To make this fruit sketch look more like an apple, let’s add a stem. This part of the apple consists of two slightly curved lines and a small oval at the very top. You can make this part more uneven than in the EasyDrawingArt example.
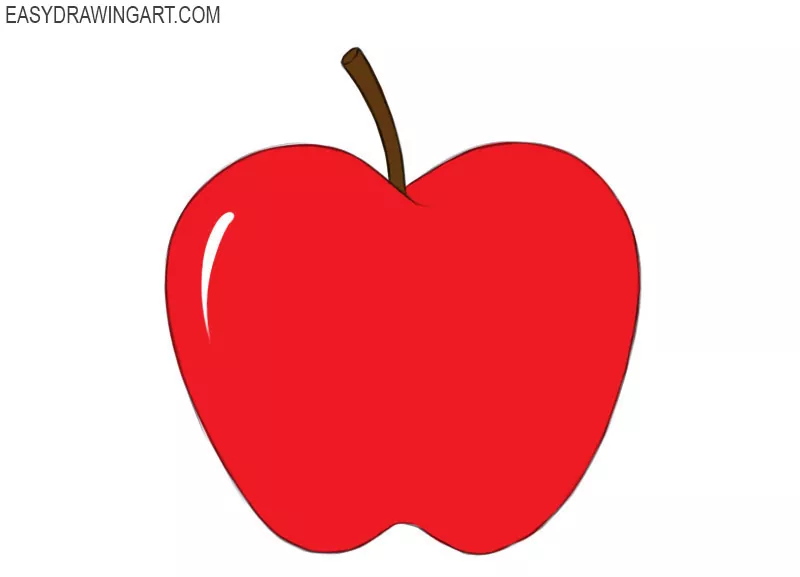
Step 7: Shade the apple naturally
You can leave your apple picture black and white, or add some color and shadows. This will give your work of art a more realistic and “tasty” look. You can color your apple either in red (as in our picture), green or yellow.

Color is just as important as shape. So, in addition to the basic color scheme from this lesson, you can make your drawing of the apple more three-dimensional and detailed if you want it to look more realistic.
First, you can add a darker red color to the lower part of the fruit to show the shadow. This is the so-called cast shadow that lies on the apple itself.
Next, using a dark gray color, add the cast shadow under the apple. It should correspond to the highlight that was added earlier.
You can also color the apple not in red as shown in the example, but in yellow or green.
Or you can make a gradient color, for example partly yellow and partly red, which is also often seen on different apples.
So, who will this drawing lesson be most useful for?
First, for beginner artists who want to learn how to draw simple objects. Second, for those who want to improve their drawing skills.
This lesson will also be useful for anyone who wants to learn how to draw complete and well-constructed still lifes.

why is drawing things hard
What do you mean? It’s easy. Well, for people who are taking art class.
This tutorial is very simple, just try it again, and your will get a great apple drawing.
this is way to eaaaaaaaaasy
Good to know this tutorial was simple for you
This is so easy . I love drawing good things but when they are easy to draw. I don’t take art classes. But I draw allot.
That’s great, Stefan. Drawing regularly is what really helps you improve, not just classes.
I love it
What do you mean. Drawing on this web is so easy.