How to Draw a Wizard

In this tutorial, we will show you how to draw a wizard. For this guide, we decided to choose the familiar image of Gandalf the Gray.
We’ve all watched fantasy or played video games where magic coexists with the human world. There is no magic in our world, but there is drawing, which, like magic, helps us to bring the images we have invented into reality.
After going through all the steps of this lesson on how to draw a wizard, you will get a fairly realistic and three-dimensional drawing of a wizard.
How to Draw a Wizard
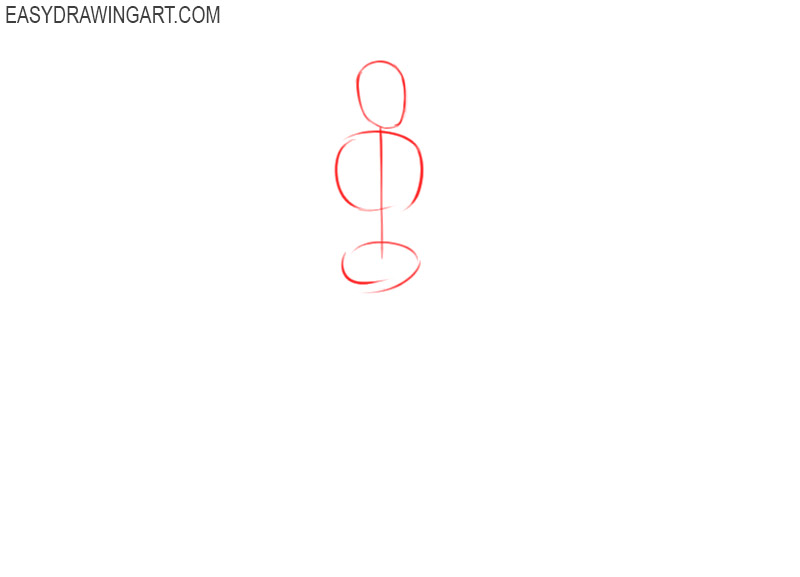
Step 1 – Sketch the Head, Chest, and Pelvis
Draw three free-form ovals. Place each oval on top of the other. The upper oval is the head, the middle is the ribcage, and the lower is the pelvis. Mark the position of the axis with a straight line.
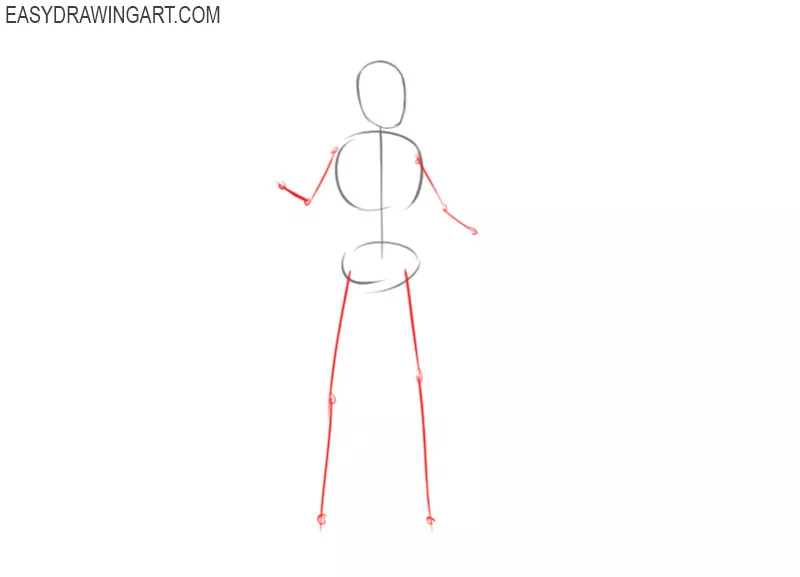
Step 2 – Sketch the Limbs of the Wizard
Draw the limbs. The left arm is bent at the elbow, the right arm is set aside and slightly lowered. The two legs are parallel to each other and start from the pelvis.
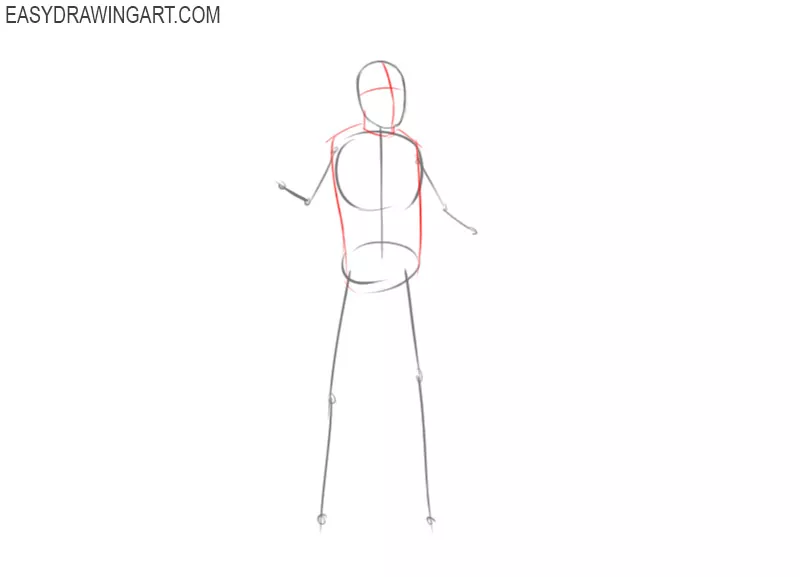
Step 3 – Sketch the Facial Guidelines and Torso
Mark the head with two criss-cross lines. Sketch the wizard’s future robe using a cylindrical shape. Draw it over the chest and show the location of the neck.
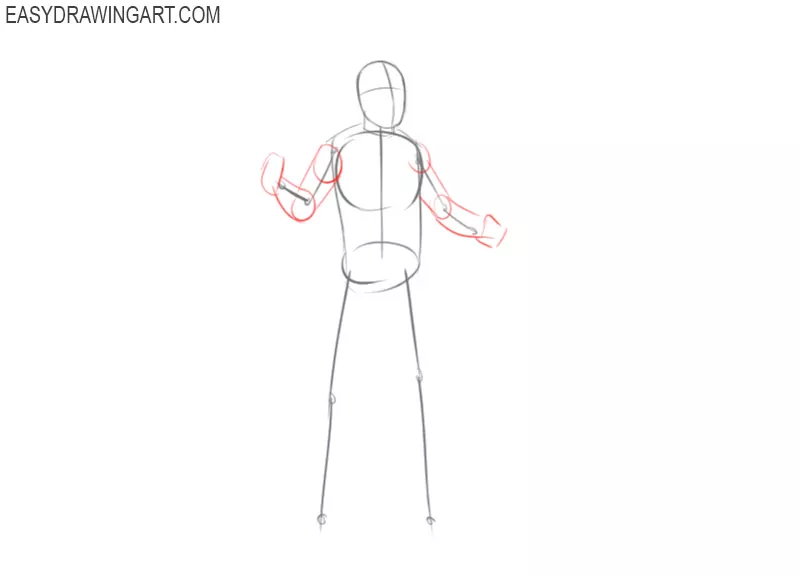
Step 4 – Add Volume to the Arms
Firstly add some volume to the wizard’s upper arms and forearms. Sketch out the shoulder and elbow joints using simple circles. At this stage, draw simple geometric shapes instead of palms.
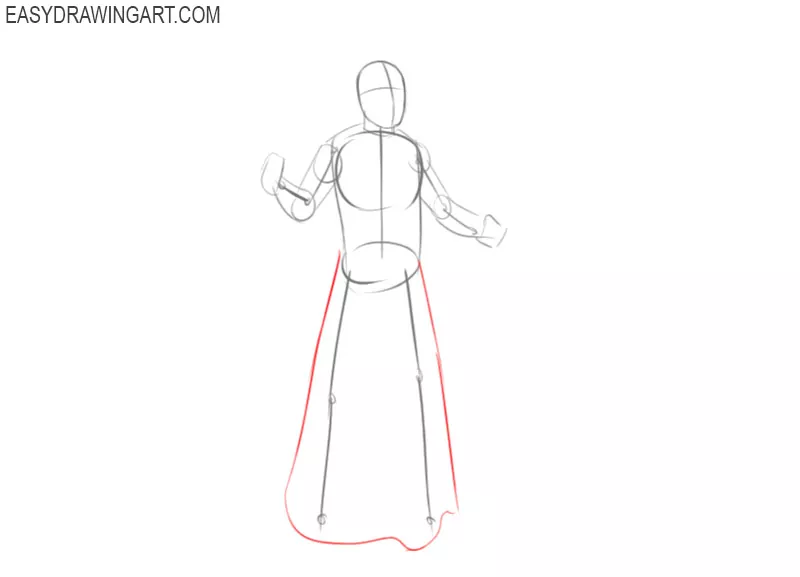
Step 5 – Start Drawing the Robe of the Wizard
Draw the lower part of the robe, which goes down along the legs to the very ground. After that, draw the bottom edge of the robe. To make this piece of clothing look realistic, give it a wave-like shape.
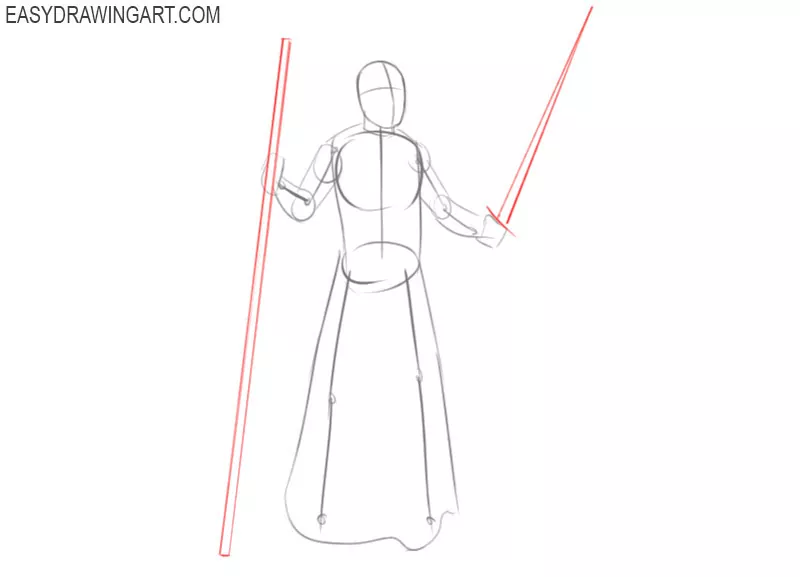
Step 6 – Draw the Weapon of the Wizard
Place the magic staff in the left hand and make it look like a long pole. In length, it is equal to the height of the wizard. In the wizard’s right hand, draw the outlines of a sword with a narrow blade and a guard.
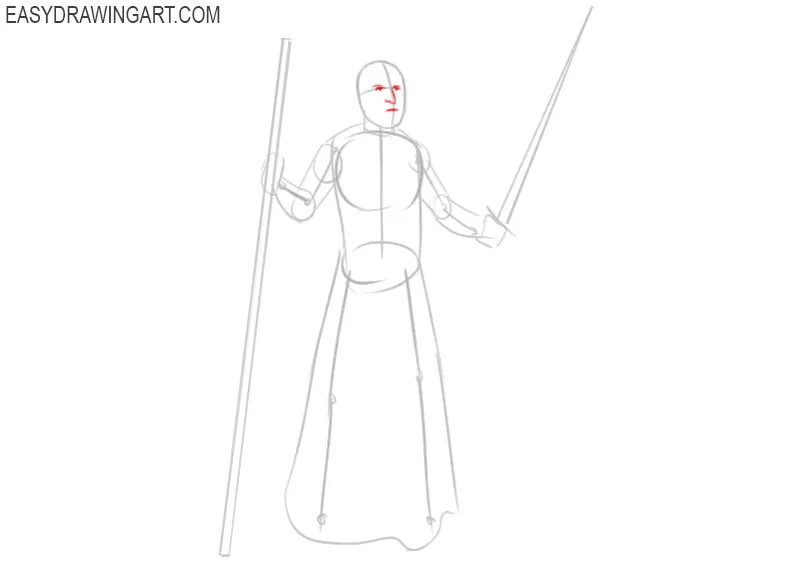
Step 7 – Draw the facial Features for the Wizard
To do this, place two small strokes right in the center of the head. Use the horizontal line from the first stages. Then draw the nose a little below. After that, draw the mouth below the nose.
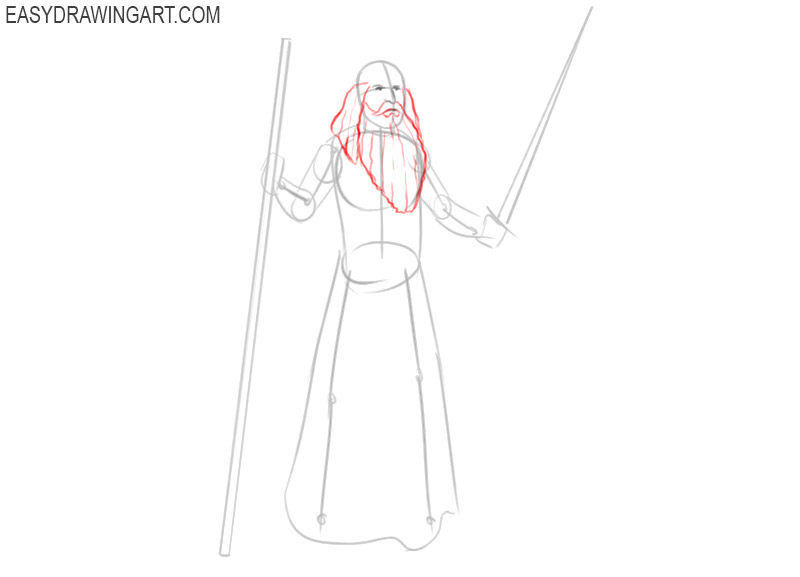
Step 8 – Draw the Beard and Hair of the Wizard
Draw a triangular shape over the chest and cover the shoulders. Use strokes to add relief and layering to the wizard’s beard.
Step 9 – Draw the Hat of the Wizard
Start with wide brims of the headgear and position the hat so that the top of the head is not visible underneath. Then, add an elongated cone to the hat and finish off the design with the tip.

Step 10 – Draw the Sleeves
Go back to creating the robe. Draw lines along the arms to create outlines of the sleeves. You should get stretched and large sleeves. Then, mark the folds of the fabric with strokes.
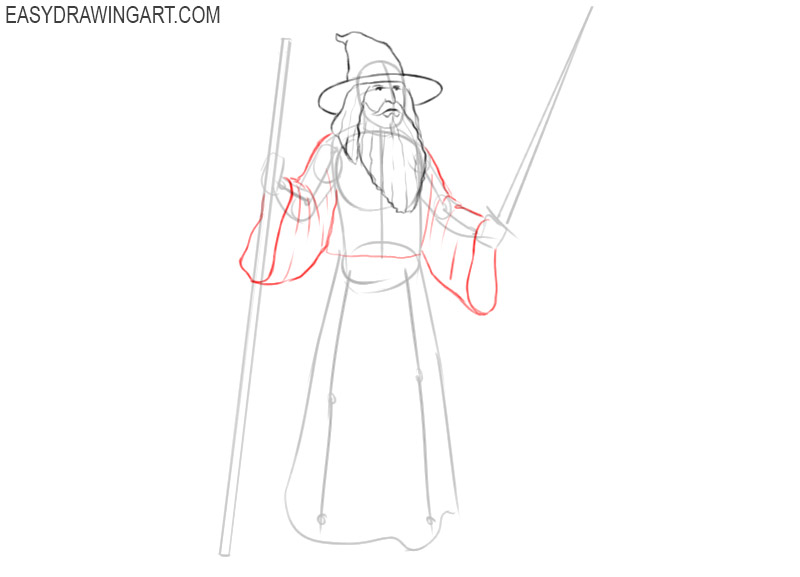
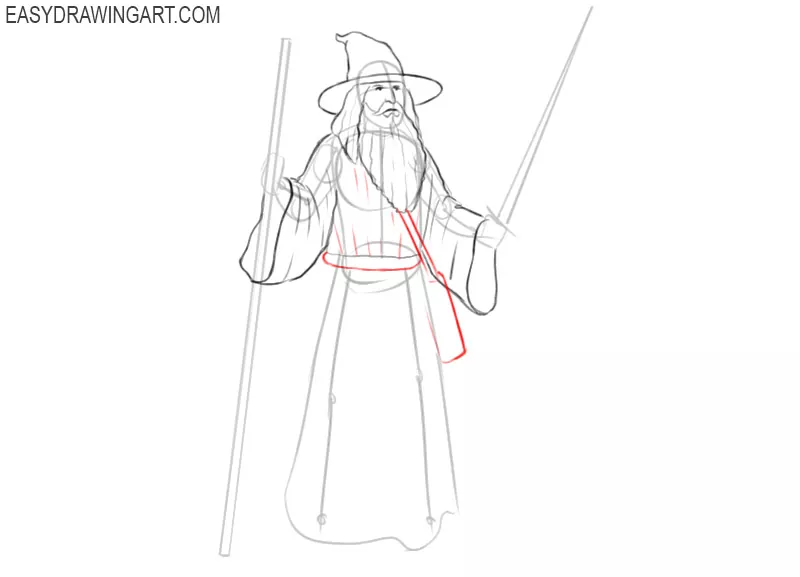
Step 11 – Draw the Belt and Bag
It crosses the torso and creates a lot of folds on the robe. On the right side of the wizard is a bag, which you must attach to the belt. Draw a belt around the waist and use strokes to mark the folds on the robe.
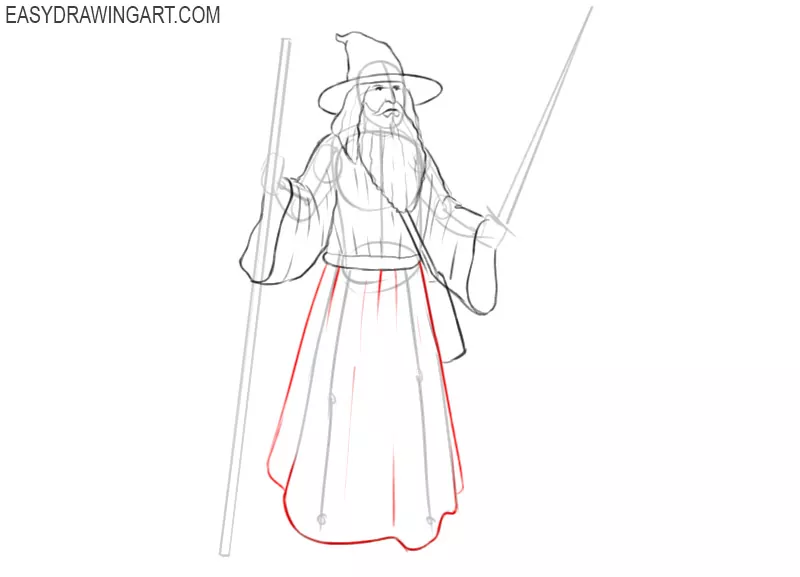
Step 12 – Detail the Robe of the Wizard
Add volume and relief to the robe. Using a row of vertical lines create the folds, that start from the belt. After that, add extra lines on the sides to make the bottom of the robe even more voluminous.
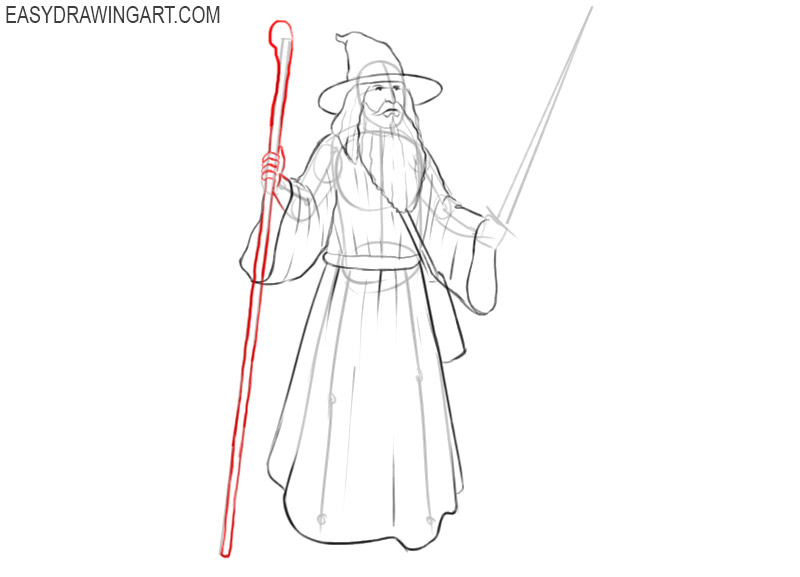
Step 13 – Detail the Staff of the Wizard
Return to the staff. To make it look like a staff, you need to clearly define its silhouette. Try to give a slight roughness to the edges of the staff. Further, draw each finger that grasps the staff.
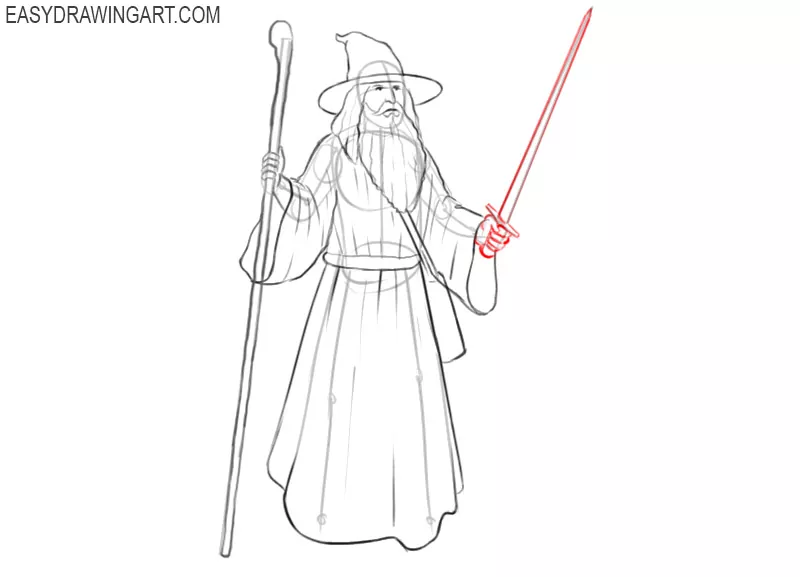
Step 14 – Detail the Sword and Left Hand
Draw the fingers on the right hand in the same way. After that, place the sword guard over the wizard’s clenched palm. The blade begins from the guard. Make sure the blade is sharp.
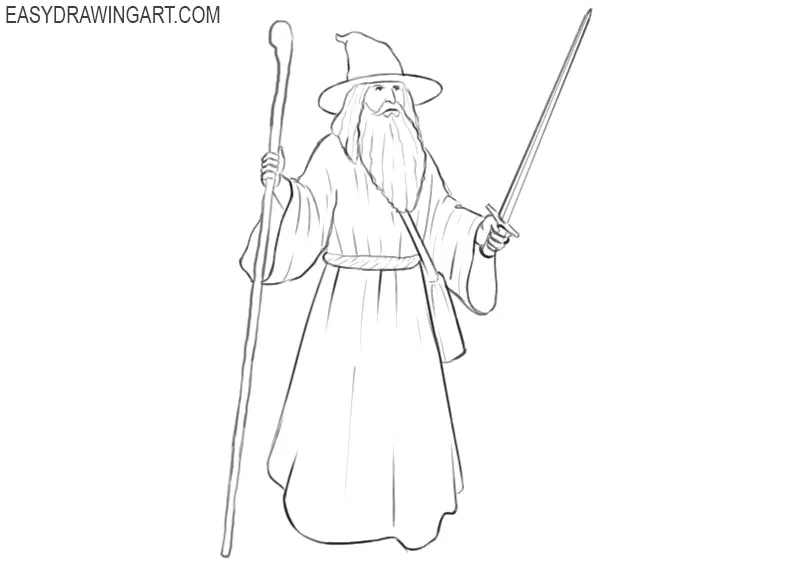
Step 15 – Erase the Guidelines
The wizard drawing is almost ready. Erase all guidelines using an eraser. After that, you can add any additional details, for example, inscriptions on the robe or scrolls inside the bag.
Step 16 – Color the Wizard Drawing
Start with the color scheme for the wizard. Use a dark gray color to paint the robe of the wizard. Make the beard light gray. Fill the hat with the color of the robe. The handle and guard of the sword are gray, and the blade is light gray. The staff, belt, and bag will be brown.
So we have finished drawing the wizard. Using this wizard drawing lesson, you can draw not only Gandalf but also Dumbledore, Merlin, and any other typical fantasy wizard.