How to Draw a Seal

In this very easy tutorial, we will show you how to draw a seal step by step. This guide consists of just eight simple steps.
Seals may look clumsy on land, but their streamlined bodies help them swim quickly and dive with ease. They use their flippers to move through the water, and most species have gray or brown fur.
By the end of the tutorial, you’ll have a finished drawing of a seal resting on the ground with its head raised and front flippers tucked beneath its body.
Time needed: 1 hour
How to Draw a Seal
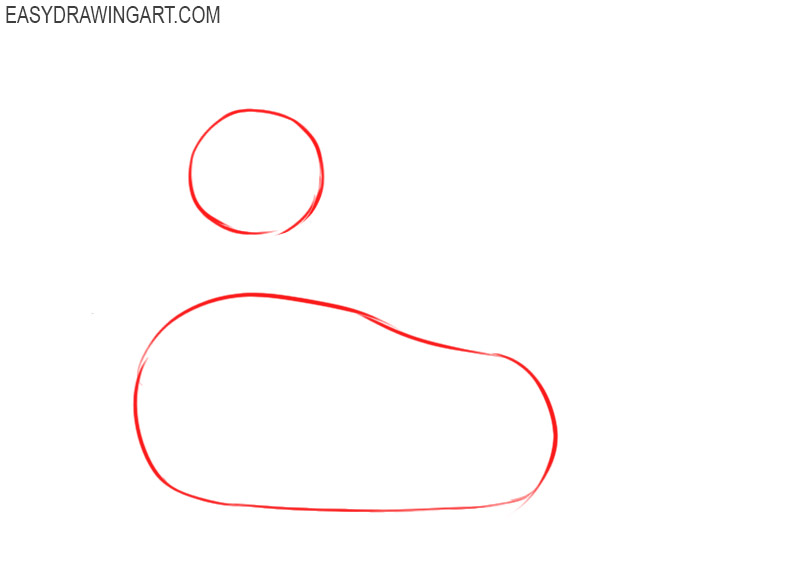
- Add basic markup.
Draw the location of the seal’s head in the form of a circle, and also add the figure below the head, as shown in the figure.

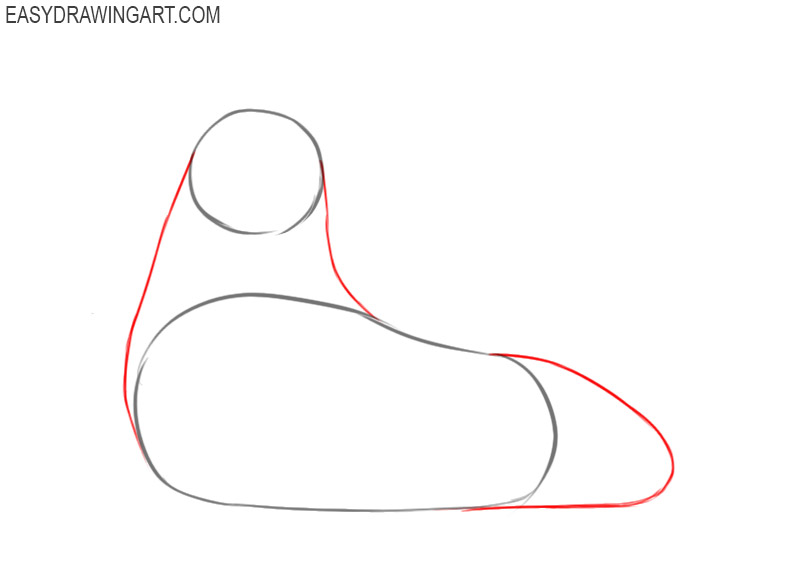
- Draw the neck and back of the seal’s body.
Using two curved lines of different lengths, connect the previously drawn shapes, and also add a curved line on the right side.
- Add the facial features of the seal.
Inside the previously drawn seal’s head, depict two eyes, nostrils and the mouth using straight, curved and rounded lines.
- Depict the elements on the seal’s head and body.
To make the seal look more realistic, add rounded and curved lines around its head and neck.
- Sketch out the seal’s limbs.
At the bottom front of the seal’s body, add curved lines of varying lengths, as shown.
- Depict the seal’s tail.
The tail of the seal looks like flippers. Draw this to the right of his torso using curved lines of varying lengths.
- Correct inaccuracies.
Now, the drawing is almost ready, and you should use the eraser to remove all unnecessary auxiliary lines.
- Color the drawing.
To color the seal, use different shades of gray and black. Add highlights on the eyes and also mark areas of shadow.





That’s the end of this fascinating and useful drawing lesson, in which you learned how to draw a seal step by step. We hope you had a great time and were able to improve your artistic skills. We will be glad to receive comments from you, where you leave your feedback about this lesson, as well as your wishes for the next drawing lessons.