How to Draw Wolverine’s Head

In this comic book drawing tutorial, we will show you how to draw Wolverine’s head in his classic black and yellow mask.
We have previously shown how to draw Wolverine in the style seen in classic Marvel comics. In this tutorial, we will focus on drawing Wolverine’s face in more detail.
To demonstrate you the process of drawing the head, we will use the classic black and yellow mask as an example. To modify Wolverine’s head, you may adjust the shape of the ears or change his facial expression.
Additionally, you can apply a different color scheme, such as brown and orange, to change the overall appearance. When drawing Wolverine’s head, note that the features and details should be sketched in a comic style. Use bold, bright colors for the face, and apply contrasting shadows typical of comic illustrations.
How do Draw Wolverine’s Head Step-by-Step
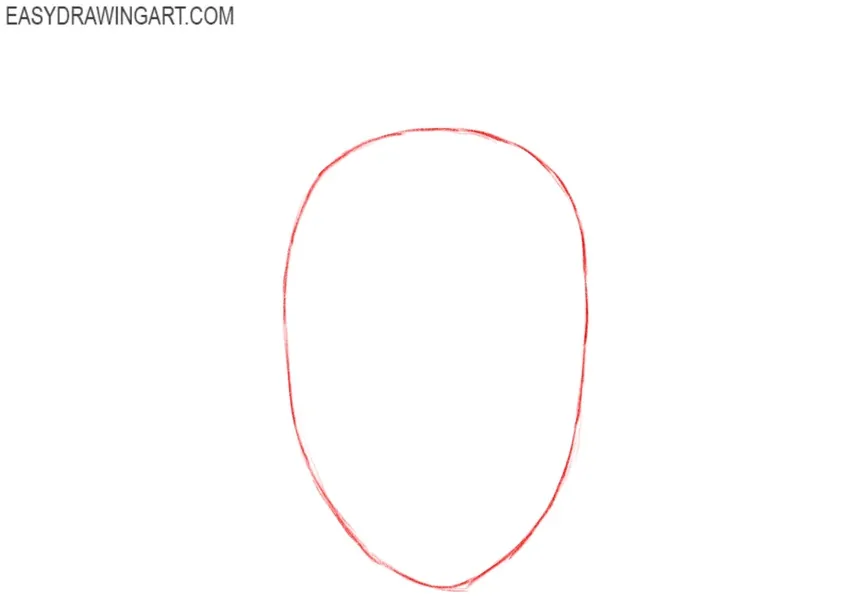
Step 1: Sketch out the Head of Wolverine
Draw an oval shape for Wolverine’s head. Use very light and soft lines for these basic shapes of the head, as you will refine and erase the outlines later.
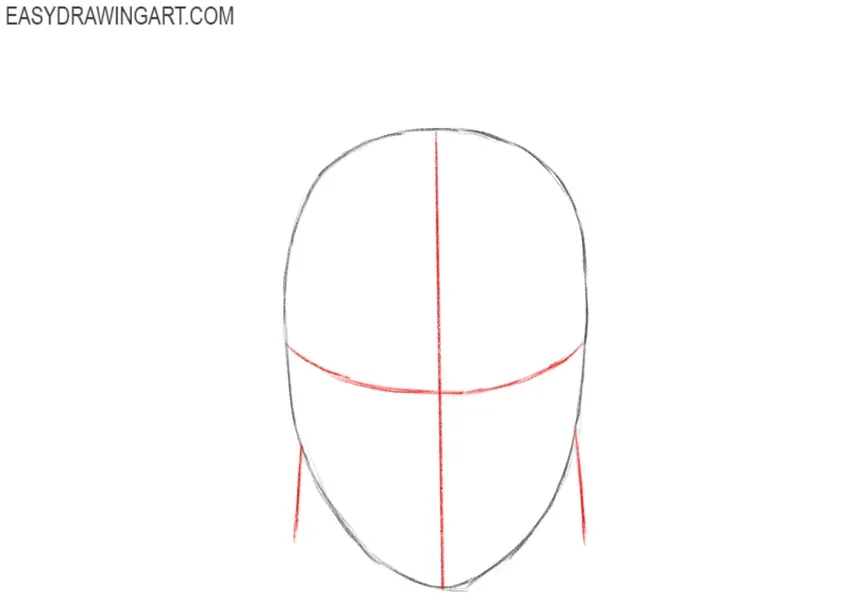
Step 2: Sketch out the Facial Guidelines
Draw a vertical line down the center of the oval, dividing the head in half. Then, add a horizontal line across the middle to mark where the eyes will go. These will help you position the facial features symmetrically.
Step 3: Mark Positions for Eyes, Nose, and Mouth
Lightly mark small lines for the eyes on the horizontal guideline, then place a mark for the nose below the eyes. Finally, add a small mark for the mouth of Wolverine.

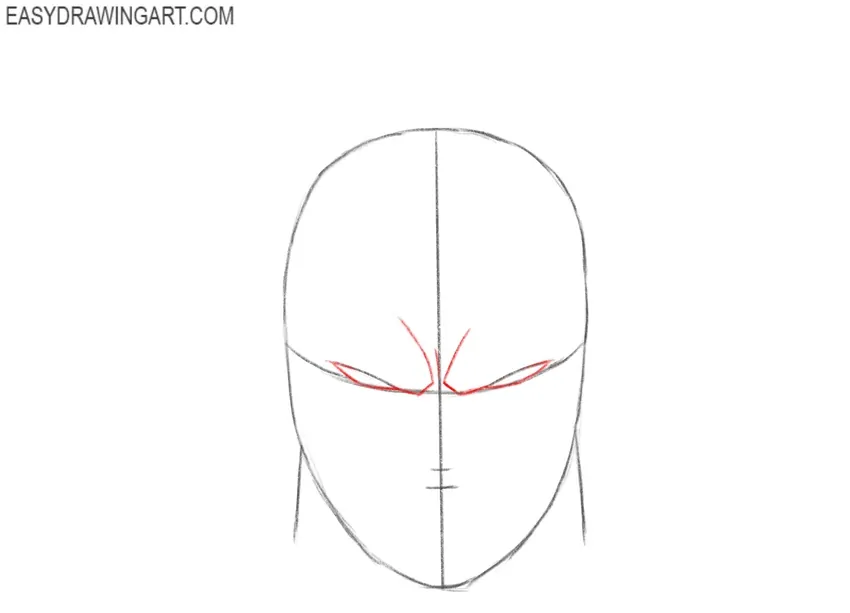
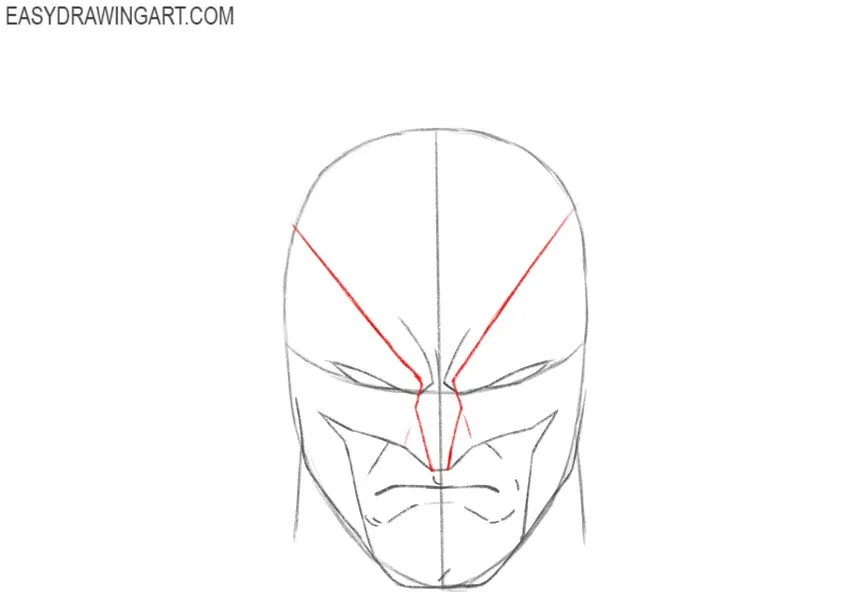
Step 4: Draw the Eyes and Creases on the Bridge
Draw Wolverine’s eyes using sharp, narrow shapes, continuing the lines from the previous step. Then, draw two angular creases extending from the eyes toward the center of the forehead.
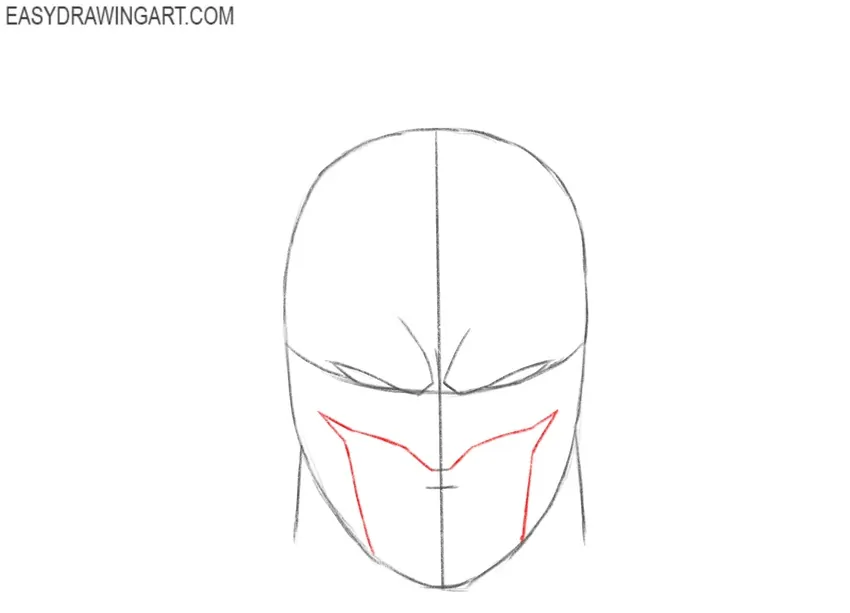
Step 5: Draw the Wolverine’s Mask Opening
Draw the outline of the mask opening that frames Logan’s mouth and chin. This line also indicates the bottom of the nose. Use straight lines to create this part of Wolverine’s face.
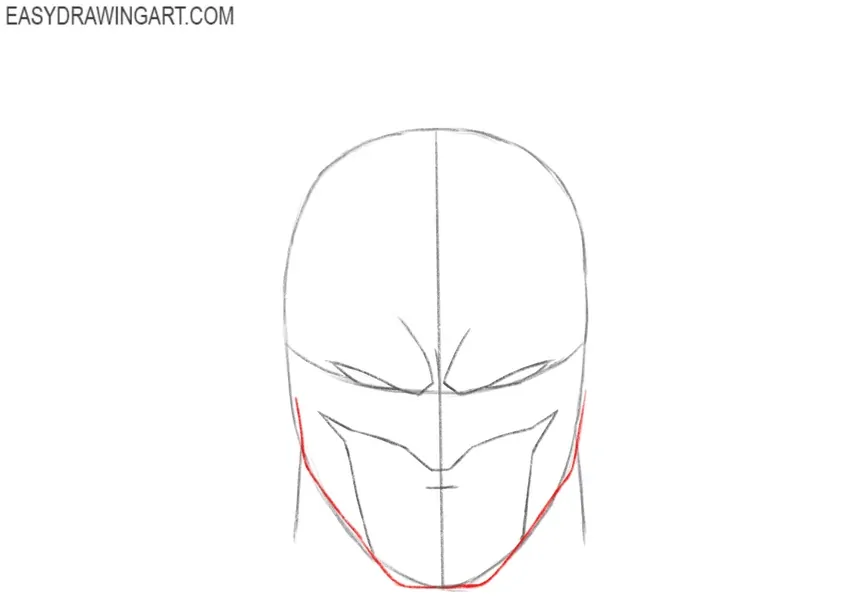
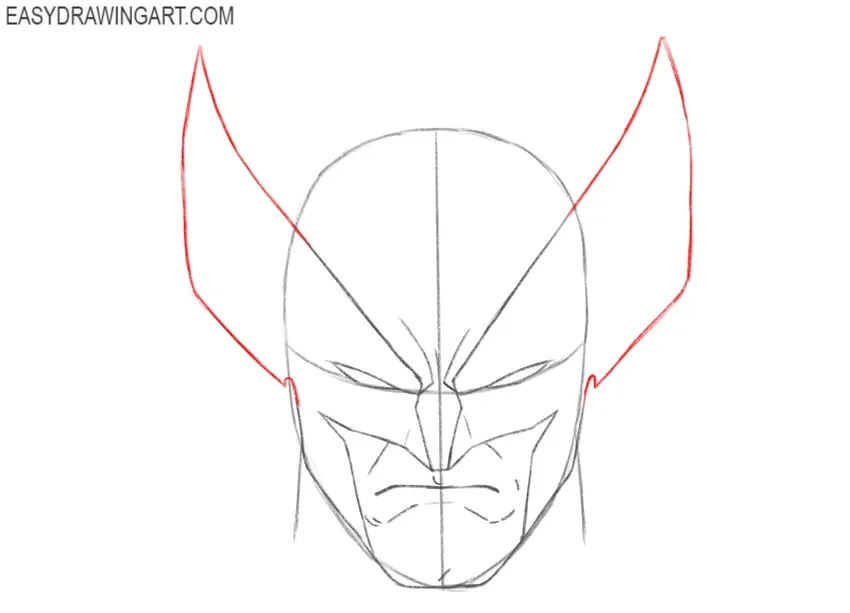
Step 6: Draw the Jawline of Wolverine
Now, shape the jawline by drawing stronger, angular lines along the sides of the face. Try to create Wolverine’s muscular jaw as in our example.
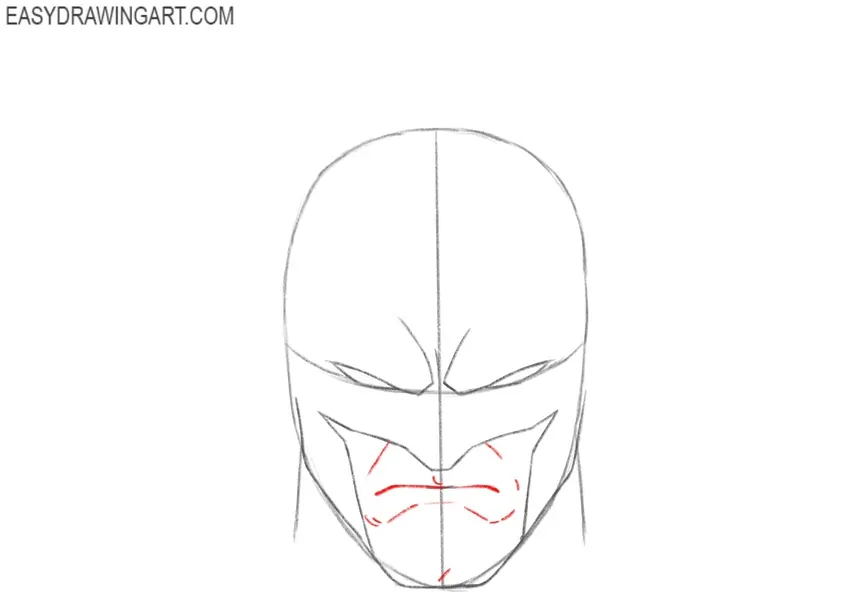
Step 7: Depict the Mouth of Wolverine
Draw a tight, almost straight line for the mouth, keeping it simple. Add slight curves at the corners of the mouth to give the face of Wolverine a subtle grimace.
Step 8: Draw the Nose and Start Sketching the Ears
First, draw the lines of the mask that frame the nose. Use angular lines for the nose. Next, draw the starting lines for the large ear-like extensions of the mask, extending from the sides of the upper part of the nose.
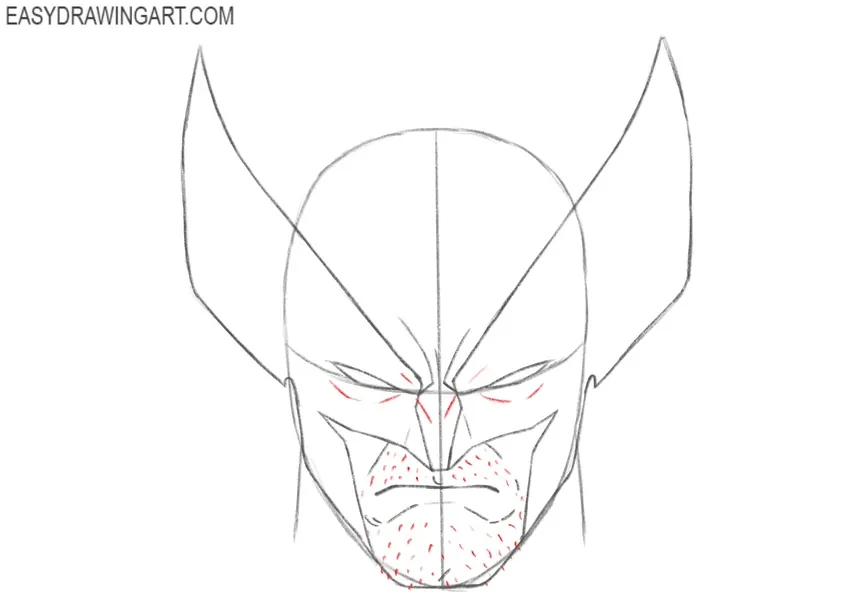
Step 9: Finish Drawing Wolverine’s Mask Ears
Complete the ear-like extensions of Wolverine’s mask by drawing the lines further upward in sharp, angular strokes. Make sure that both sides are symmetrical and follow the same sharp angles.
Step 10: Add Creases and Stubble to the Face
Add additional creases around the eyes and on the forehead. Then, lightly sketch small dots and lines around the chin and jawline to create the appearance of Wolverine’s stubble.
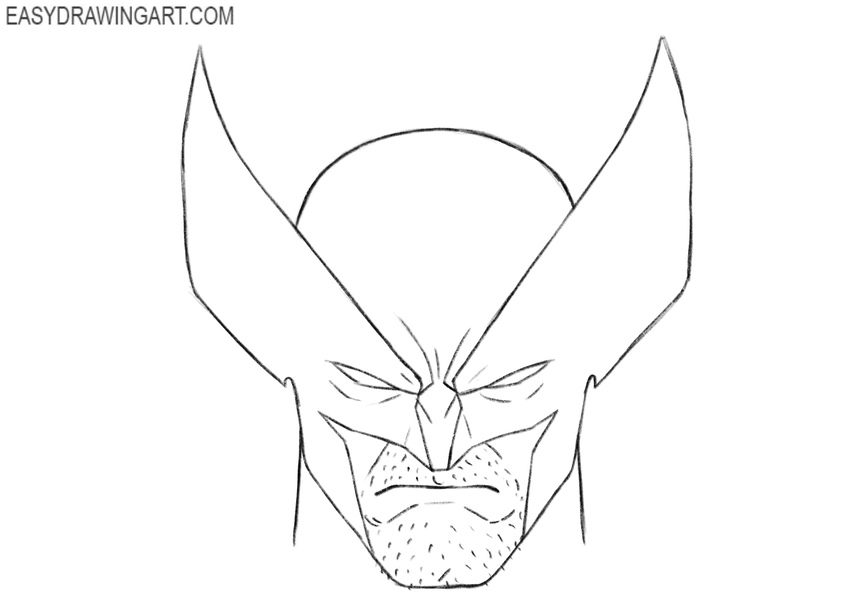
Step 11: Erase the Guidelines
Erase all the initial guidelines from the Wolverine’s head drawing. Once clean, trace the remaining lines with a darker pencil to create the final drawing.
Step 12: Color Wolverine’s Head Drawing
Color the mask, using black for the ear extensions and yellow for the main part of the mask. Add shading to the face to give it column, especially around the eyes, nose, and jawline.
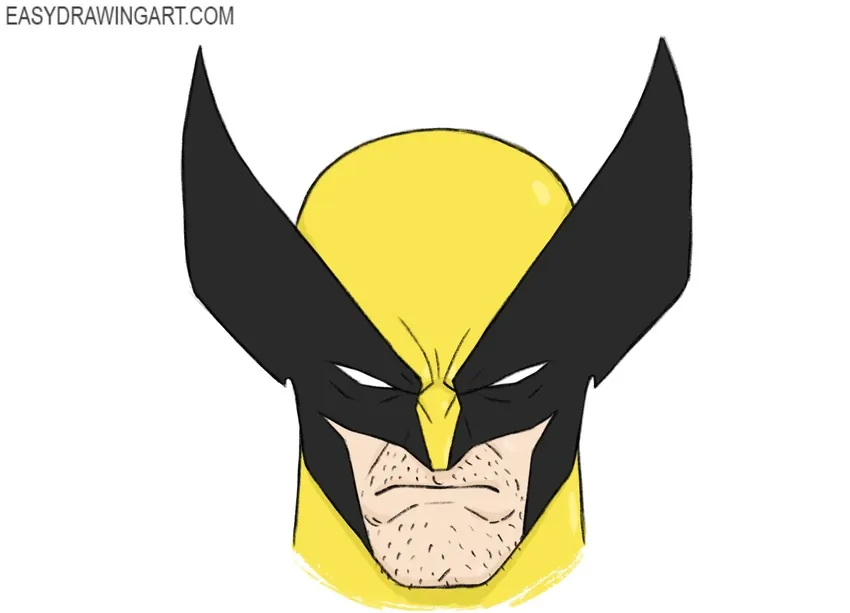
This lesson showed how to draw Wolverine’s head in a classic comic book style. We used a traditional color palette and sketched the face with classic shapes. As mentioned earlier, you can make Logan’s head look more realistic by adding more detailed features and shadows, or more comic-book style by using stronger contrasting shadows.
For inspiration, we recommend improving your visual skills by reading classic Marvel and DC comics. Additionally, to further train your drawing abilities, visit Easydrawingart.com regularly to learn how to draw Spider-Man and other comic book characters.