How to Draw Barbie
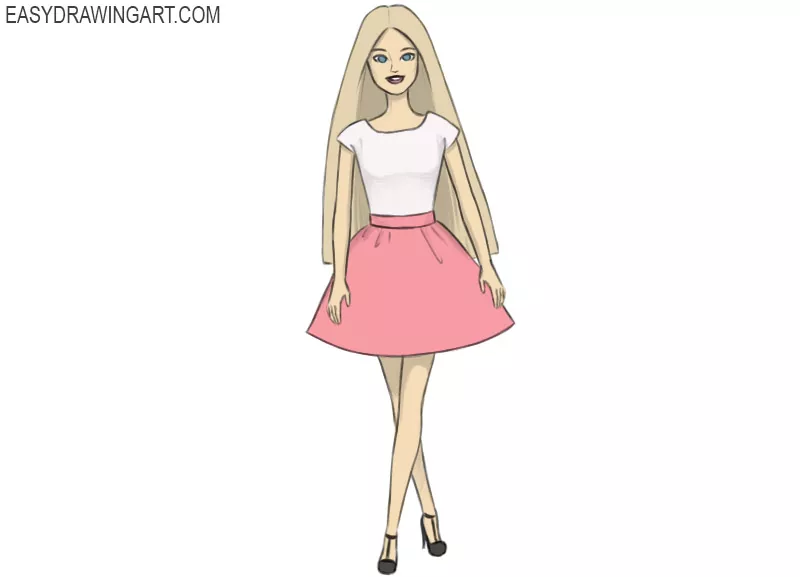
Learning how to draw Barbie becomes much easier when the construction is accurate from the very beginning.
The head, torso, and hips create the main framework and pose. The hair, clothing, and facial features simply develop around that framework instead of defining it.
There are many different types of Barbie dolls, each with a different body type and facial features. In this tutorial, we’ll show you how to draw the most recognizable type of Barbie, but you can change the facial features and colors to create your own version.
How to Draw Barbie Step by Step
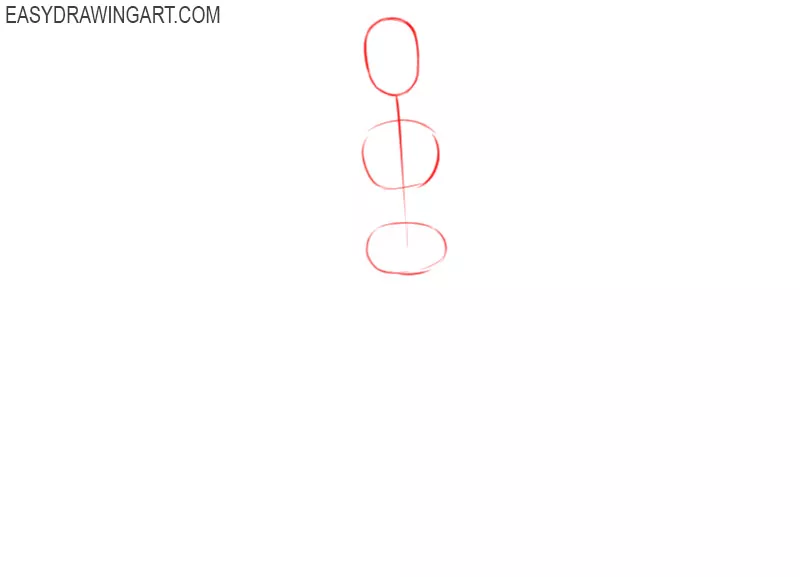
Step 1: Sketch the basic Barbie construction
First, draw a vertical centerline for the figure of Barbie. Add three rounded shapes along it to mark the head, chest, and pelvis, leaving enough space between them for the neck and waist.
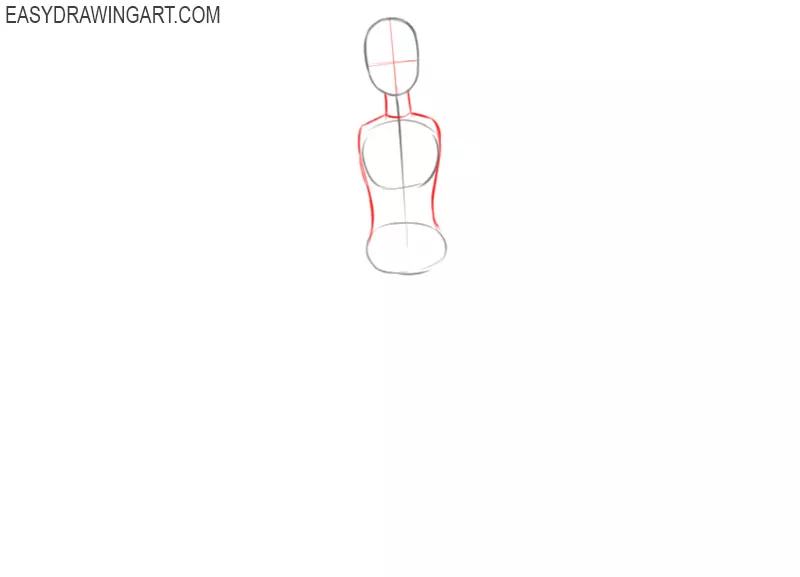
Step 2: Outline the neck and torso
Draw the neck, shoulders, and sides of Barbie’s torso around the construction shapes. Add one vertical and one horizontal guideline across the head to place the facial features.
Step 3: Mark the arms and legs
Use straight construction lines to mark the position of the arms and legs. Place small circles at the shoulders, elbows, hips, and knees to indicate the main joints.

Step 4: Draw Barbie’s eyes and eyebrows
Draw the large eyes of Barbie along the horizontal guideline, using the centerline. Add the upper eyelids, pupils, eyelashes, and gently curved eyebrows above them.

Step 5: Add the nose and mouth
Use a short, thin line to draw the small nose below the eyes. Outline the upper and lower lips with smooth rounded lines, placing the mouth directly beneath the nose.
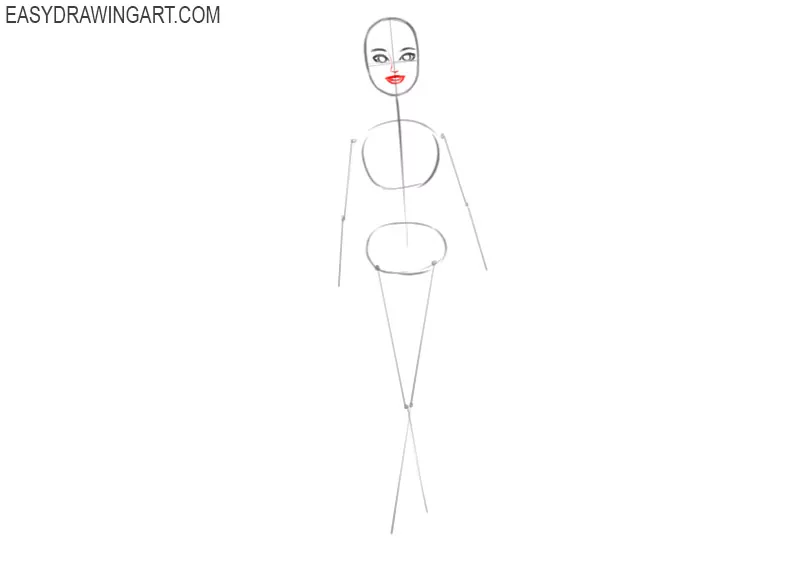
Step 6: Sketch the doll’s hairstyle
Outline the outer shape of the hair with long curved lines that fall past the shoulders. Then draw Barbie’s hairline above the forehead and add several strands around the face.

Step 7: Draw Barbie’s fitted top
Use curved lines to outline a short, fitted sleeveless top around the torso. Draw the neckline, arm openings, and lower edge while following the shape established in the construction.
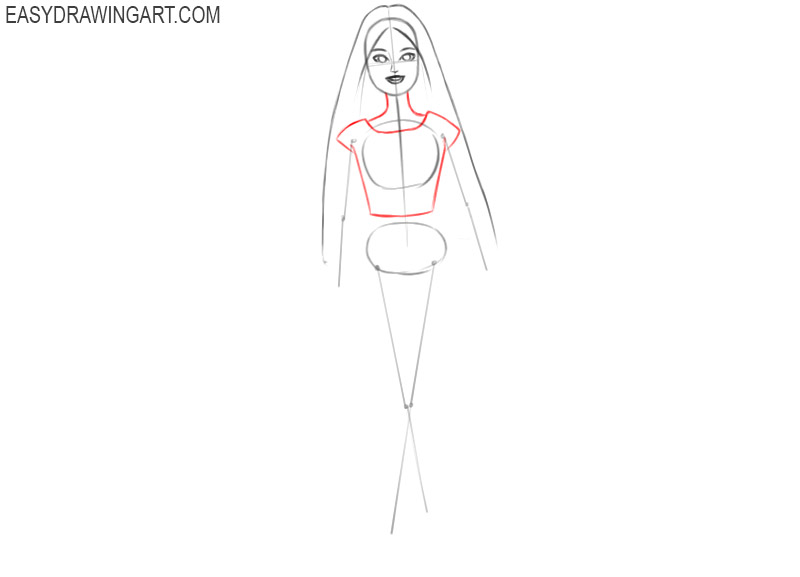
Step 8: Add volume to the arms
Draw smooth lines along both sides of Barbie’s arm guidelines to form the shoulders, upper arms, elbows, and forearms. Narrow the contours gradually as they approach the wrists.

Step 9: Outline the doll’s hands
Outline the hands at the ends of the wrists. Use small curved lines to separate the fingers, keeping the shapes narrow and consistent with the slender arms.

Step 10: Draw the short skirt
First, draw a narrow waistband around Barbie’s waist. Extend two slightly angled lines downward for the sides of the skirt, then connect them with a smooth lower edge.

Step 11: Define Barbie’s legs
Add smooth outer contours around the leg guidelines. Shape the thighs, knees, calves, and ankles with gradual curves, keeping both legs slender and aligned with the hips.

Step 12: Add the heeled sandals
Draw the feet and outline the heeled sandals around them. Add the soles, heels, and straps that rise toward the ankles, using short curved lines to define each part.

Step 13: Clean up the Barbie line drawing
Erase the centerline, facial guidelines, joint circles, and other construction marks. Darken the remaining contours and correct any uneven lines around the face, clothing, limbs, and hair.
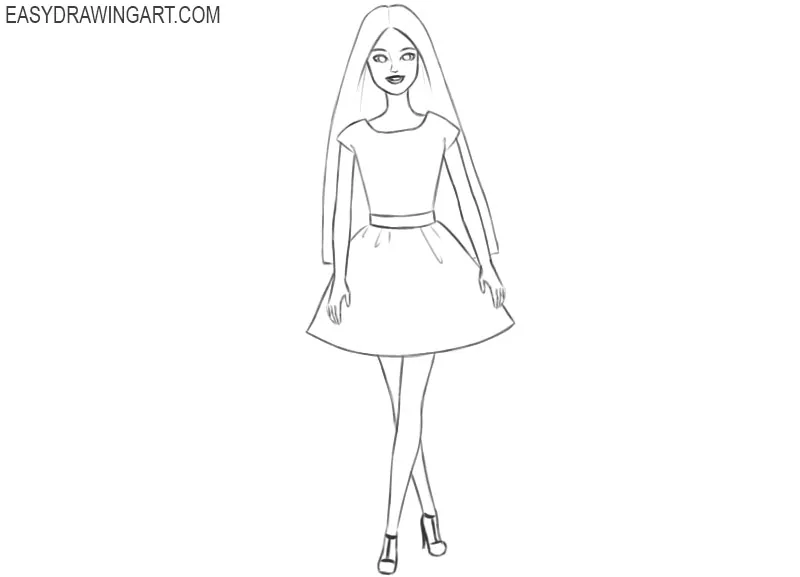
Step 14: Color the Barbie drawing
Color the skin with a natural shade and make the hair beige or light blond. Use pink for the top, black for the skirt, and blue for the eyes, then add light shadows where needed.
More About Drawing Barbie
The hairstyle should follow the shape of the head before it falls over the shoulders. Starting the outer contour too far from the skull makes the hair look inflated rather than full.
Place the waistband before drawing the sides of the skirt. This line fixes the height of the hips and makes it easier to keep both sides of the clothing even.
When cleaning the sketch, erase the construction lines gradually instead of removing them all at once. Some of them remain useful while you correct the hands, knees, and alignment of the feet.
The narrow waist and long legs depend on the first construction shapes. If the pose feels stiff, redraw the centerline before adjusting the outer contours; changing the silhouette later usually creates more problems than it solves.
For another full-body figure, try to draw a girl with a more natural build, or sketch a princess whose clothing changes the shape of the pose.
You can also replace Barbie’s outfit by drawing a dress or sketching a different skirt. Keep the clothing lines close to the body at the waist, then let them move outward where the fabric hangs freely.