How to Paint a Sunset
A complete guide on how to paint a sunset. This tutorial will explain how to create an evening landscape from scratch.
Whether you work with canvas and paint or prefer digital formats using a graphics tablet, the basic principles remain the same. Let’s see what you absolutely need to know before you start painting a sunset.
Start by painting the background that will serve as the basis for your sunset, providing the right tone and mood for the entire piece.
Good sunset paintings are famous for their rich transitions from warm to cool tones, so it’s important to know how to mix colors to achieve the desired effect.
Working with light and shadow will add more realism and dimension to your sunset painting. Experiment with different paint techniques to make the water appear more realistic and the sky appear smooth.
Patience and attention to layers will create a richer image, so take your time and give each layer plenty of time to dry.
Don’t be afraid to bring your own unique style to your sunset, even if you follow general guidelines. It is important to remember that every sunset is unique, and there is no one right way to depict it. This lesson provides the foundation, but your job is to experiment as you find your way into art.
Add details that will give your sunset more realism, such as silhouettes of birds in the sky or delicate clouds colored by the last rays of the sun. These small elements can significantly enrich a composition.
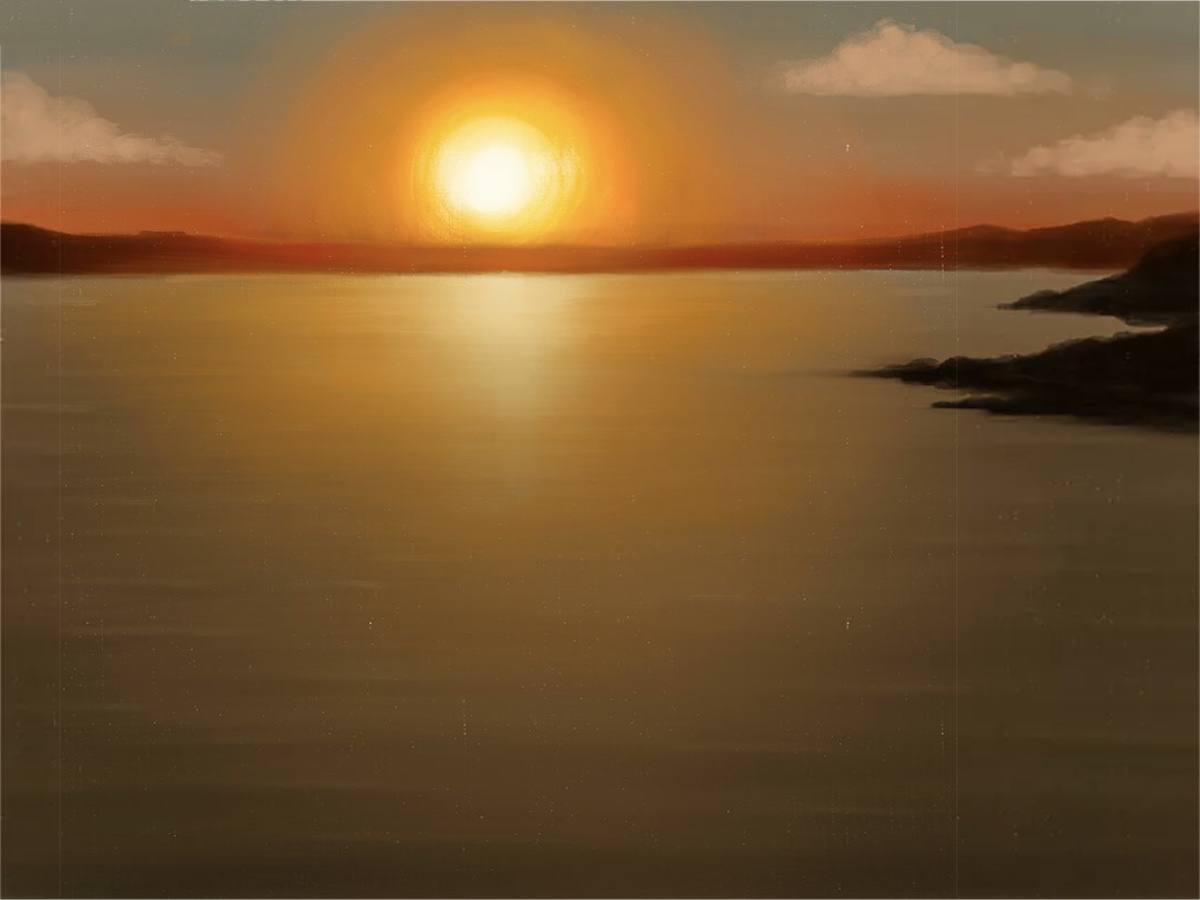
How to Paint a Sunset Step-by-Step
Step 1 – Create the basic layer for water
This layer serves as the foundation for the water surface that will later reflect the sunset sky. Choose a color that is light enough to allow for reflection in subsequent layers, but dark enough to contrast with the bright colors of the sunset. Apply strokes carefully to avoid visible transitions and joints, creating a smooth, even surface.

Step 2 – Paint the sunset sky
Using orange, paint a horizontal stripe in the top third of the canvas above the base color you’ve already applied. Orange should be rich and warm, smoothly transitioning from a brighter and lighter shade near the horizon to a richer and darker shade closer to the top. This layer simulates the reflection of light in the atmosphere.

Step 3 – Deepen the color scheme of the sky
Use a deep blue at the top and dark orange and red tones below, which should blend softly with the bright orange from the previous step, creating a richness of color to the space. These colors represent the the intensity of the sunset light spreading high above the horizon. Mix colors carefully to avoid harsh transitions and achieve a natural transition between daylight and evening tones.

Step 4 – Paint the hills on the horizon
Use a dark brown color to paint a horizontal line over the water surface, with slight curves to imitate the natural topography of the hills. This element should be simple enough not to distract from the main elements of the sunset, but at the same time visible enough to create the illusion of a distant land. Subtle changes in line height will help create the feeling of a natural landscape.

Step 5 – Add some details to the foreground
On the right side of the canvas, use darker shades of brown to create a more detailed illustration of part of the ground. This helps balance the composition and gives it a more three-dimensional appearance. By using different shades of brown, we add texture and contrast to the ground. This also helps create a sense of space and dimension in our composition.

Step 6 – Paint the sun and shine around
Use orange to paint a circle that will serve as the sun. Place it partially hidden behind the line of hills to create the effect of a setting sun. The brightness and size of the sun should be such that it becomes the central point of the composition, attracting attention and distributing light throughout the canvas. Give the edges of the sun a little blur to create a glowing effect at sunset.

Step 7 – Paint a sun centerpiece
Use a combination of white and yellow to paint the glow to the center of the sun, making it more realistic and noticeable. This light should softly spread around, creating a halo and highlighting the effect of the light source. This detailing of the center of the sun is critical to creating the illusion of its luminosity and to direct the viewer’s eye to the brightest area of the painting.

Step 8 – Add sunshine to the hills
Mix orange and red tones to show how the last rays of the sun illuminate the peaks and slopes. This will improve the effect of the sunset, when the sky and earth are bathed in warm colors. It is important to make this light not too bright so that it does not compete with the brightness of the sun itself, but noticeable enough to highlight the relief.

Step 9 – Paint the clouds around the sunset
Use lighter shades of orange and red to paint the clouds around the sun. The clouds should be distributed throughout the sky, to add volume and dimension. Soft, light strokes create the illusion of sunlit, fluffy clouds, contributing realism to the sunset scene.

Step 10 – Detail the water on your sunset painting
Now give the water the desired color using deep blue and green tones, making the shade lighter as you get closer to the horizon and the sun. Transitions between colors should be smooth so that the color of the water looks natural. It is also important to leave some areas of the water darker to illustrate the waves and movement of the water.

Step 11 – Paint the reflection of the sunset on the water
Using orange and light yellow shades, paint a streak of reflection running from the setting sun to the foreground. This reflection should be brighter closer to the sun and gradually fade away as it moves away from it. This reflection gives the painting a sense of realism to the sunset over the water.

Step 12 – Add the finishing touches to your sunset painting
Increase contrast and saturation where necessary to highlight key elements such as the sun, clouds and water reflections. Pay attention to details, such as small waves on the water or additional clouds in the sky, which will add realism to your sunset painting. Finishing touches can also include improving shadows and highlights to give the painting a more three-dimensional appearance.

And at the end of this lesson on creating a sunset in paint or digitally, it is useful to review a few key points that may improve your understanding and improve your skills.
The first important aspect is practice and observation. Regularly observing sunsets in real life can deepen your understanding of color and light, allowing you to paint with more accuracy.
Each sunset is unique, and learning to observe its details will help you illustrate subtle variations in light and shadow.
The second is experimenting with materials and techniques. Trying different types of brushes, paints, or digital tools may help you find your style. Experimentation can broaden your skills and allow you to create more interesting paintings.
Third, consider the reflection of your perspective in your sunset paintings. Aim to create a painting that reflects not only the view but also your interpretation of the scene and its qualities.
Finally, recognize the value of criticism and self-reflection. After completing your sunset painting, review what went well and identify areas for improvement. Feedback from other artists and viewers can provide new ideas and insights.