How to Draw Shrek
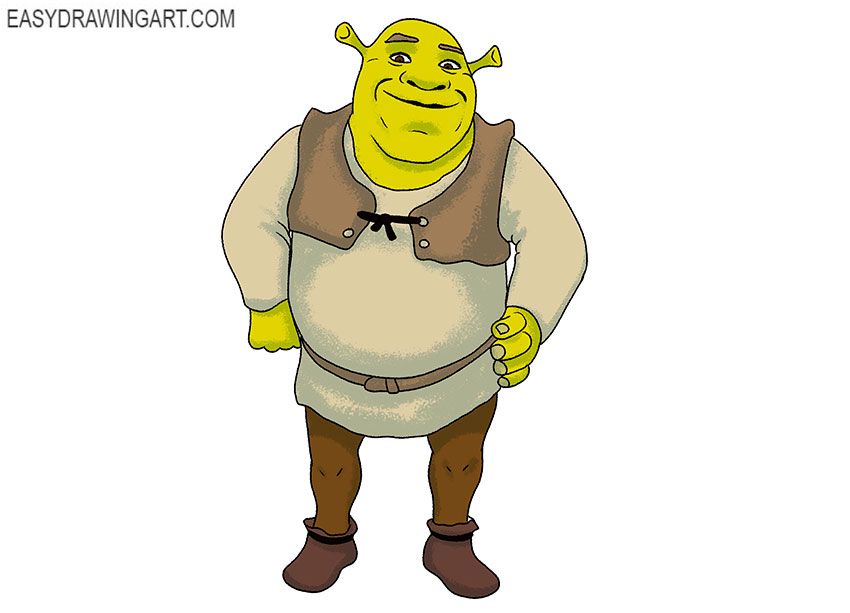
Drawing popular characters is fun and interesting, so you will definitely enjoy the new step-by-step guide on how to draw Shrek. This is a huge green ogre that lives in the swamp.
Shrek has a bad temper, but a good soul. Shrek’s body has a bright green color, the ears are short and rolled into a tube, the nose is large, and the mouth is very wide.
Try to correctly depict all these elements in your drawing.
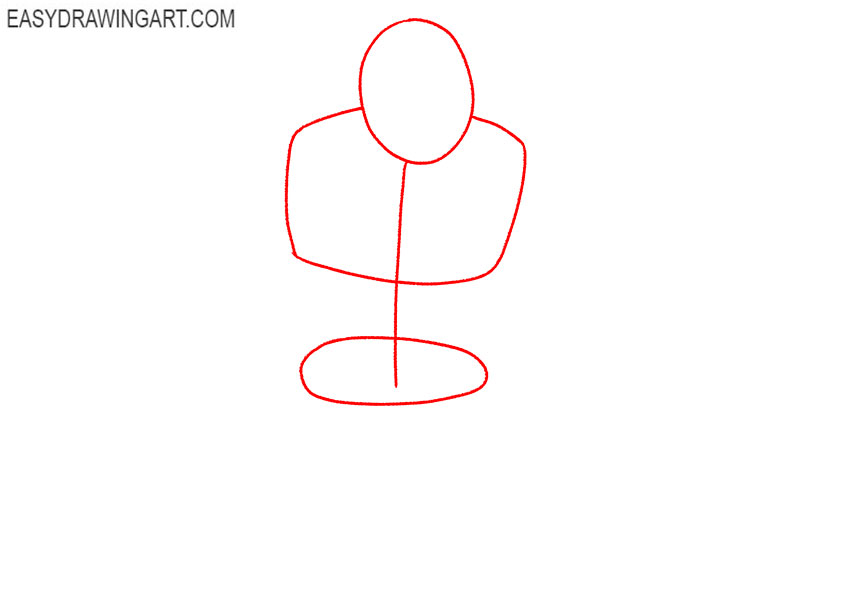
Step 1: Sketch the basic shapes for Shrek
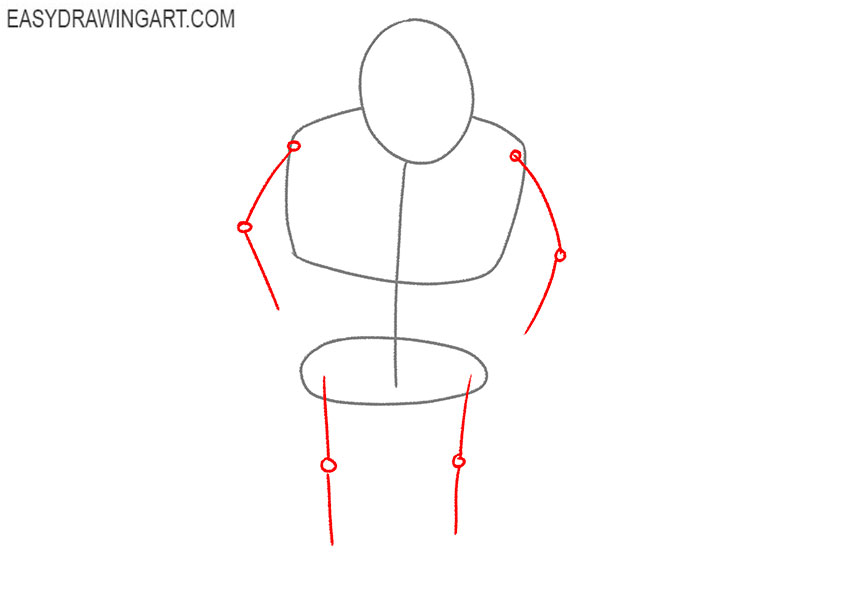
Draw an oval for Shrek’s head, a wide shape for the chest, and a smaller horizontal oval for the pelvis. Connect these forms with a curved vertical line through the center of the body.
Step 2: Add Shrek’s arm and leg guidelines
Use thin lines to sketch Shrek’s bent arms and straight legs. Mark the shoulders, elbows, and knees with small circles, then extend the lower arm and leg guidelines from these joint marks.
Step 3: Draw the head and ears of Shrek
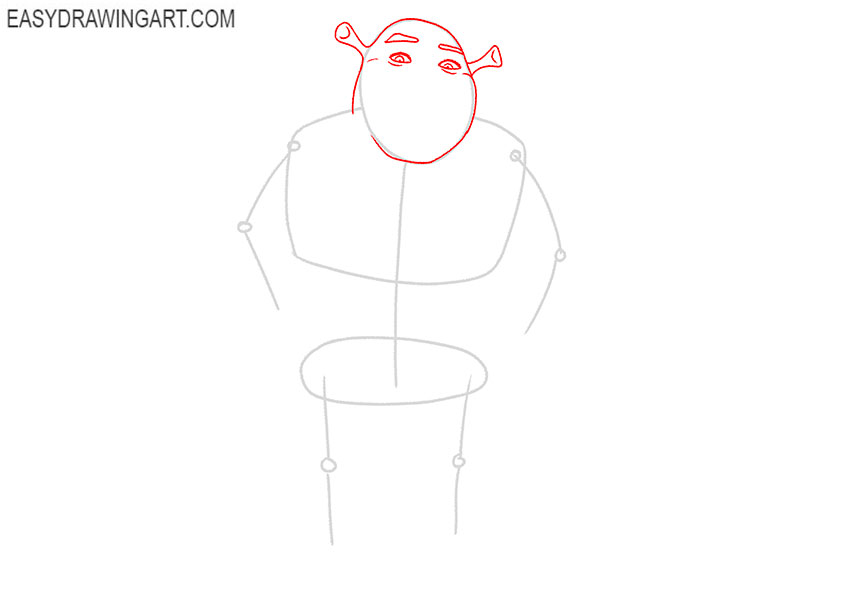
Refine the oval into the shape of Shrek’s head and jaw. Extend his tubular ogre ears out from both sides, then draw the narrow eyes, pupils, curved eyebrows, and short lines above the eyelids.
Step 4: Draw Shrek’s nose and smile
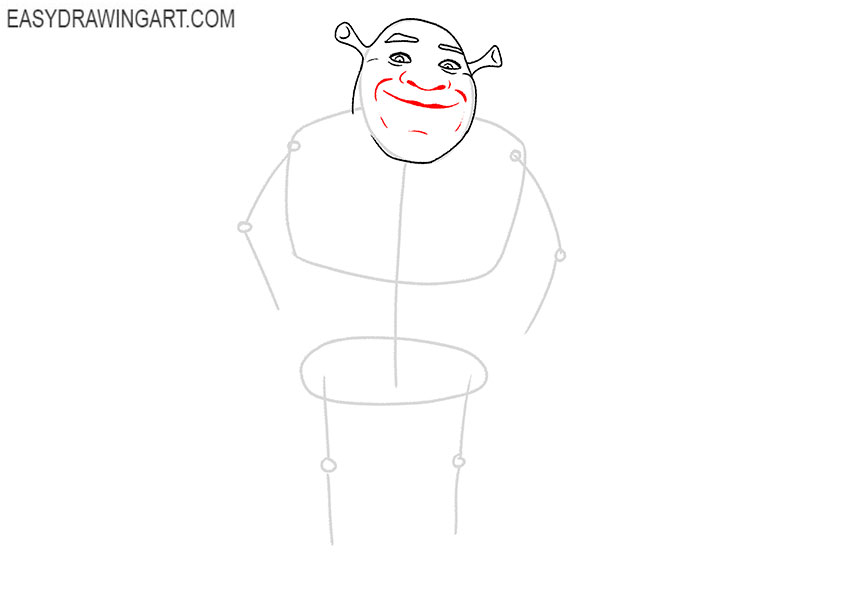
Draw Shrek’s broad nose below the eyes and add the curved nostrils. Outline his wide smiling mouth, lower lip, chin, and the short creases beside the nose, cheeks, and chin.
Step 5: Outline Shrek’s vest and collar
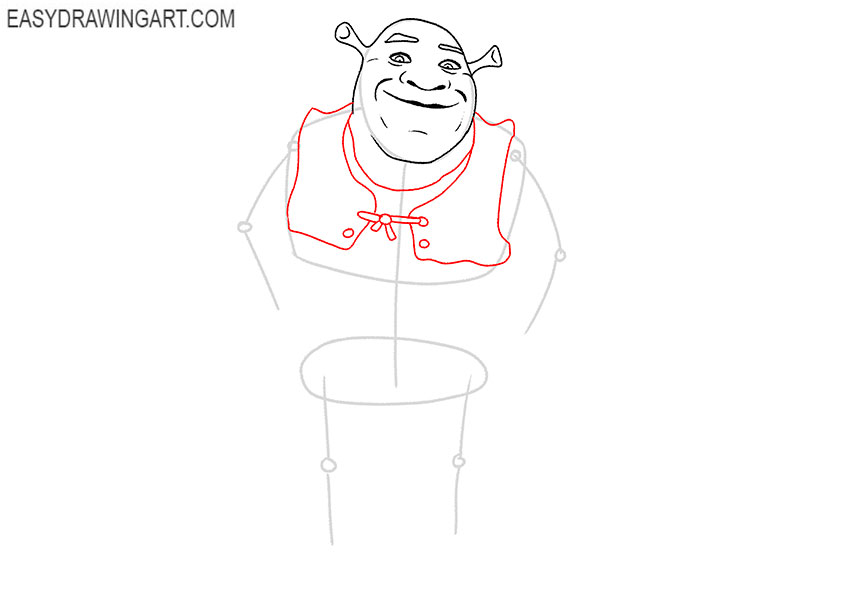
Draw the collar around Shrek’s neck, then outline the wide vest across his shoulders and chest. Add the uneven lower edges, circular fasteners, and the short tied cord in the center.
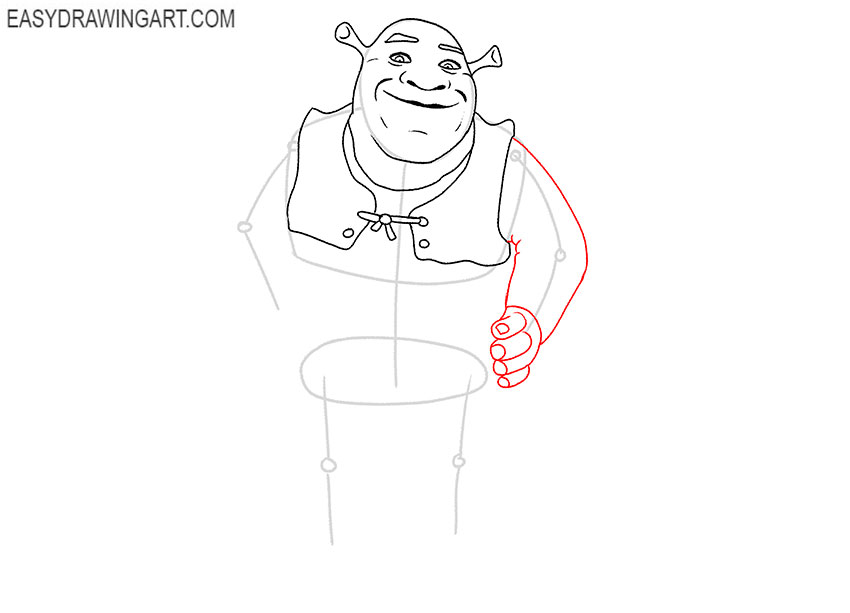
Step 6: Draw Shrek’s right arm and hand
Outline the arm on the right side of the Shrek drawing, widening it around the upper arm and forearm. At the bottom, draw the curled thumb and four overlapping fingers forming a loose fist.
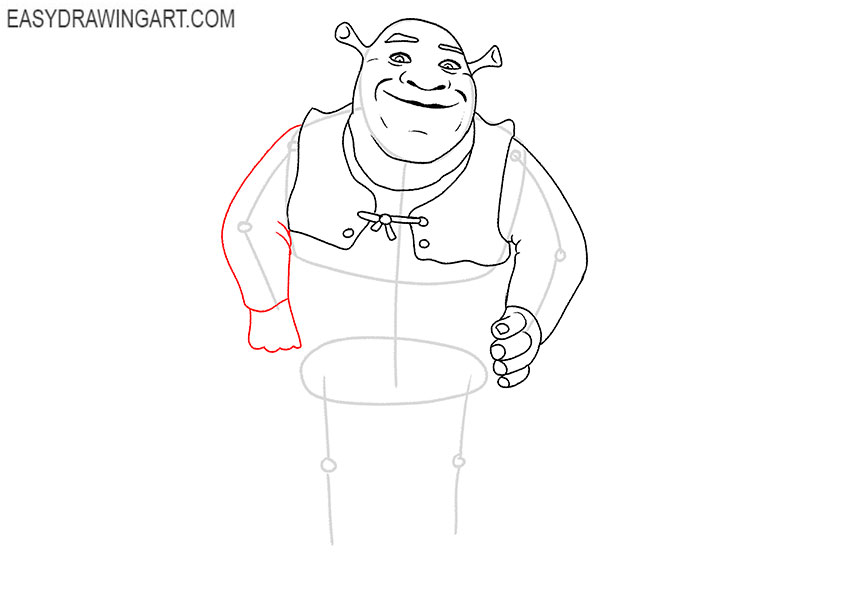
Step 7: Sketch Shrek’s left arm and fist
Draw the other arm with curved lines that follow the shoulder, elbow, and forearm guidelines. Add a short sleeve crease near the torso, then outline the lowered fist with several finger bumps.
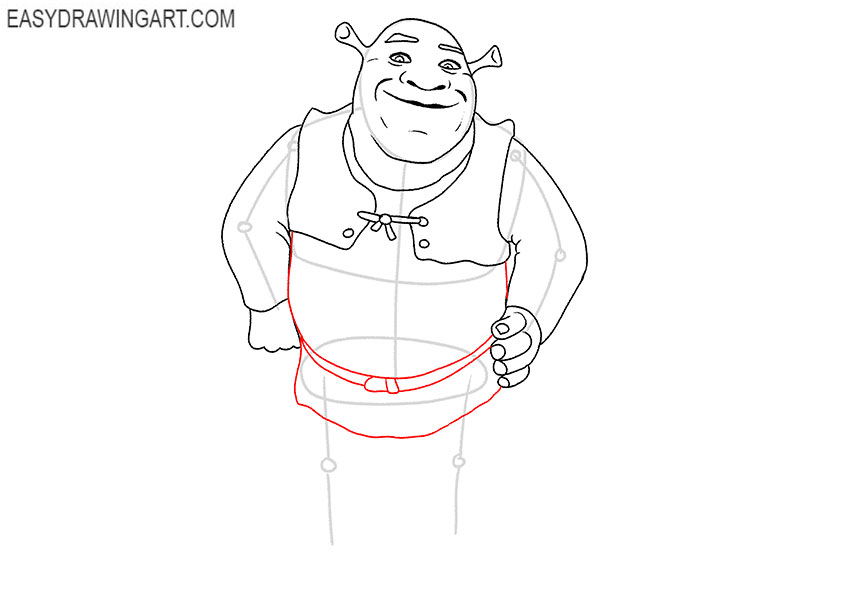
Step 8: Draw Shrek’s tunic and belt
Outline the sides and curved lower edge of Shrek’s tunic around the large torso. Draw the belt of Shrek as two curved parallel lines across the waist, then add the small rectangular buckle in front.
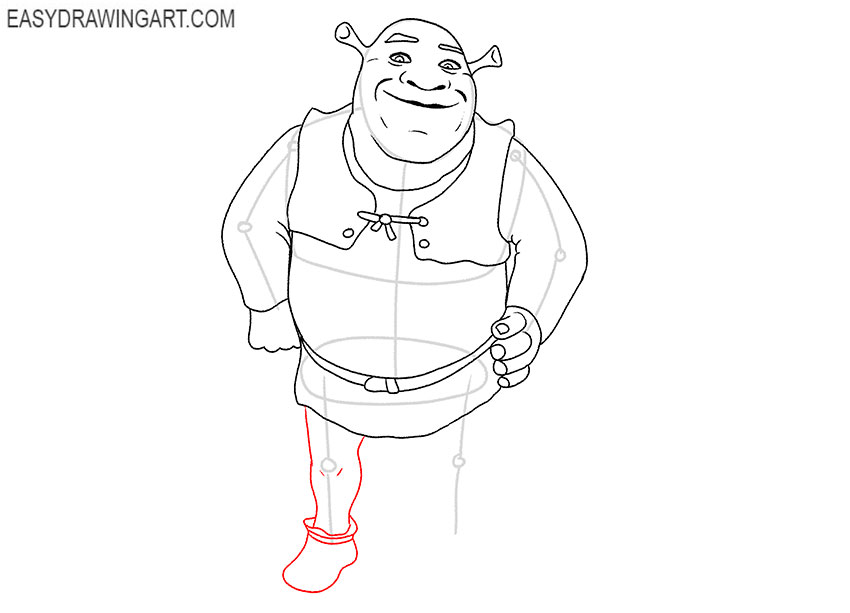
Step 9: Outline Shrek’s first leg and boot
Use curved lines around the first guideline to form Shrek’s thick leg, narrowing it near the ankle. Add two short knee creases, then draw the folded boot cuff and boot below it.
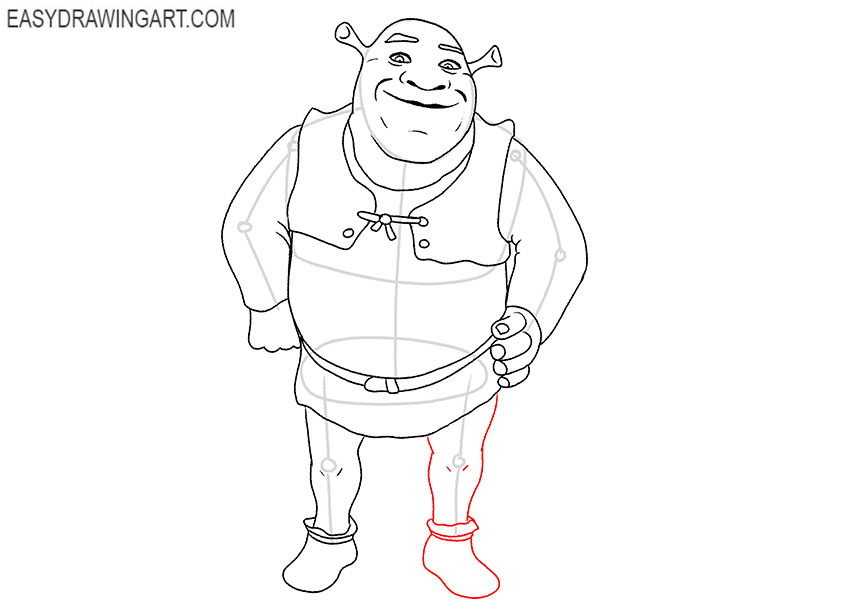
Step 10: Draw Shrek’s second leg and boot
Outline the second thick leg around its construction line and taper the shape toward the ankle. Draw the small knee creases, folded cuff, and boot.
Step 11: Clean up the Shrek line drawing
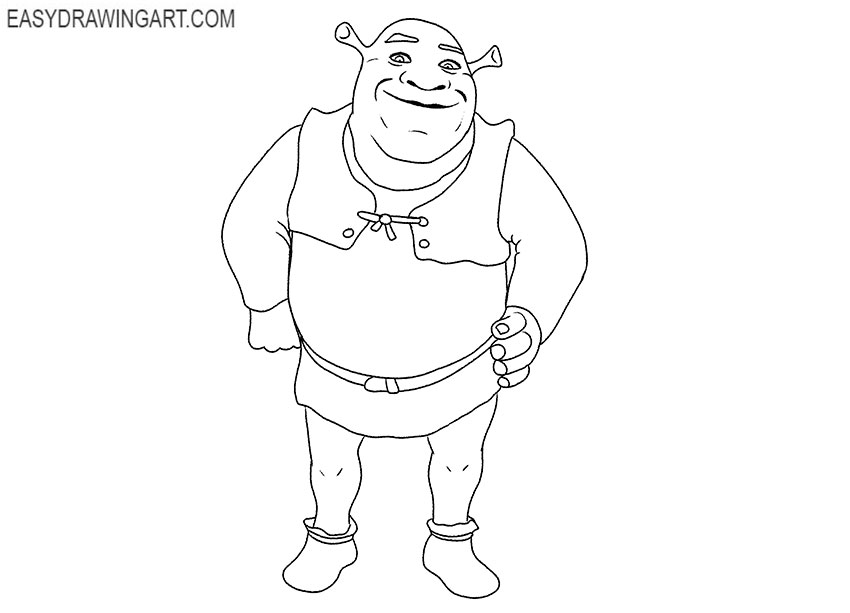
Erase the remaining construction lines from inside Shrek’s head, torso, arms, and legs. Refine any rough contours and darken the final outlines, keeping the smaller facial and clothing details clear.
Step 12: Color the Shrek drawing
Color Shrek’s skin yellow-green and make his tunic light beige. Use brown for the vest, belt, leggings, and boots, varying the shades between these parts and adding gray-green shadows.
Now you have learned how to draw one of the most popular cartoon characters.
If you enjoyed drawing Shrek, try another fairy-tale character by learning how to draw a princess or continue with another memorable companion by drawing a wizard using the same simple construction method.
We will wait for your feedback and suggestions. If you want to always be aware of new products, then subscribe to us on social networks.